Another way to spiffy up bananas.
Serves 2-3
Ingredients:
Chocolate Sauce
3/8 cup heavy whipping cream
3 oz. semi-sweet chocolate, chopped
1/4 tsp. cinnamon
1/8 tsp. ground cloves
1/2 tsp. vanilla extract
Bananas
2-3 small bananas
1 1/2 tbsp. butter or buttery spread
1 1/2 tbsp. packed brown sugar
1 tbsp. rum
1/2 tbsp. tequila
Ice cream
Method:
1. Make the chocolate sauce by combining the cream, chocolate, cinnamon, and cloves in a heavy-bottomed saucepan. Cook over low heat until the chocolate is melted. Do not allow the mixture to boil. Stir in the vanilla and remove from the heat. The sauce can be made up to 4 days ahead. Just cover and refrigerate it until ready to use.
2. Cut the bananas crosswise in half. Melt the butter in a large skillet over medium heat. Increase the heat to high and add the bananas and brown sugar. Cook 2 minutes, stirring occasionally, until the bananas are soft and the sugar has created a syrupy sauce. Add the rum and tequila and boil 1-2 minutes or until slightly thickened.
3. Scoop ice cream into bowls and surround it with the banana mixture. Drizzle with the chocolate sauce and enjoy immediately.
Reference:
Banana Sundaes with Mexican Chocolate Sauce from the August/September 2001 issue of Cooking Pleasures.
Showing posts with label Chocolate. Show all posts
Showing posts with label Chocolate. Show all posts
Monday, August 10, 2009

Saturday, August 8, 2009
Proof I'll use avocado for anything...
Another winner in the vegan cupcake category. :) These aren't too much different from the other vegan chocolate cupcakes I've made (I really do need to branch out and try other flavours of vegan cupcake) but they have an ingredient that makes them pretty special - AVOCADO!
Yes, my favourite fruit stars in these hunks of chocolately love.
The avocado works as a great substitute for the egg and most of the oil/butter. Since I knew we wouldn't be eating them all at the same time, I skipped a glaze or icing but I'll put a link at the bottom to the original recipe that includes a glaze idea. In the meantime, I'll be working on coming up with a vegan-approved topping that doesn't involve tofu...
Will have to try these again soon using applesauce in place of the oil and adding some semi-sweet chocolate chips (with the tofu-free glaze, of course!) :)
Makes 12 cupcakes
Ingredients:
1 1/2 cups unbleached all-purpose flour
3/4 cup unsweetened cocoa powder
1 tsp. aluminium-free baking powder
3/4 tsp. baking soda
3/4 tsp. salt
1 avocado, pitted and peeled (i.e.: scooped out of the shell)
1 cup pure maple syrup
3/4 cup plain non-dairy milk
1/3 cup canola oil
2 tsp. vanilla extract
12 unbleached muffin tin liners
Method:
1. Preheat oven to 350 F and line cupcake pan with liners.
Sift the flour, cocoa powder, baking powder, baking soda, and salt together in a large mixing bowl. Use a whisk to combine them.
2. Puree the avocado in a food processor or blender until smooth. Add the maple syrup, milk, oil, and vanilla extract and continue to blend until the mixture is creamy. Use the whisk to combine this concoction with the dry ingredients.
3. Spoon the batter into the prepared cupcake pan. Bake 20-25 minutes or until a toothpick inserted in the center comes out clean. Allow to cool and then decorate if desired.
Reference:
Here's a link to the original recipe "Glazed Chocolate-Avocado Cupcakes" from the September 2008 issue of Vegetarian Times. You can find the glaze recipe there.
Yes, my favourite fruit stars in these hunks of chocolately love.
The avocado works as a great substitute for the egg and most of the oil/butter. Since I knew we wouldn't be eating them all at the same time, I skipped a glaze or icing but I'll put a link at the bottom to the original recipe that includes a glaze idea. In the meantime, I'll be working on coming up with a vegan-approved topping that doesn't involve tofu...
Will have to try these again soon using applesauce in place of the oil and adding some semi-sweet chocolate chips (with the tofu-free glaze, of course!) :)
Makes 12 cupcakes
Ingredients:
1 1/2 cups unbleached all-purpose flour
3/4 cup unsweetened cocoa powder
1 tsp. aluminium-free baking powder
3/4 tsp. baking soda
3/4 tsp. salt
1 avocado, pitted and peeled (i.e.: scooped out of the shell)
1 cup pure maple syrup
3/4 cup plain non-dairy milk
1/3 cup canola oil
2 tsp. vanilla extract
12 unbleached muffin tin liners
Method:
1. Preheat oven to 350 F and line cupcake pan with liners.
Sift the flour, cocoa powder, baking powder, baking soda, and salt together in a large mixing bowl. Use a whisk to combine them.
2. Puree the avocado in a food processor or blender until smooth. Add the maple syrup, milk, oil, and vanilla extract and continue to blend until the mixture is creamy. Use the whisk to combine this concoction with the dry ingredients.
3. Spoon the batter into the prepared cupcake pan. Bake 20-25 minutes or until a toothpick inserted in the center comes out clean. Allow to cool and then decorate if desired.
Reference:
Here's a link to the original recipe "Glazed Chocolate-Avocado Cupcakes" from the September 2008 issue of Vegetarian Times. You can find the glaze recipe there.
Friday, July 31, 2009
Chocolate Brickle Cookies
These are the real reason I made that toffee. ;)
They disappeared before I had a chance to take a photo... guess that's just an excuse to make more!
About 5 1/2 Dozen Cookies
Ingredients:
1 1/2 cups rolled oats
2 1/2 cups unbleached all-purpose flour
1 tsp. baking powder
1 tsp. baking soda
1 tsp. salt
1 cup butter
1 cup packed light brown sugar
1/2 cup sugar
3 tbsp. shortening
2 eggs
1 tsp. vanilla extract
1 1/2 cups chopped walnuts
3/4 cup semi-sweet chocolate chips
3/4 cup milk chocolate chips
3/4 cup toffee bits
Method:
Preheat oven to 350 F.
1. Pulse the oats in the food processor until finely ground. Whisk the oats with the flour, baking powder, baking soda, and salt in a medium bowl.
2. Beat the butter, brown sugar, sugar, and shortening in the bowl of a stand mixer at medium speed for 2 minutes (or until blended). Beat in the eggs and vanilla. Reduce the mixer to low speed and beat in the flour mixture. Stir in the nuts, chocolate, and toffee bits.
3. Scoop tablespoons of the batter onto a parchment-lined baking sheet. Flatten to ~1/2-inch thick. Bake 10-12 minutes or until golden brown.
Reference:
Chocolate Brickle Cookies from Cooking Pleasures magazine (unfortunately I forgot to write down the date before ripping it out of the magazine so I'm not sure which issue this was from...)
They disappeared before I had a chance to take a photo... guess that's just an excuse to make more!
About 5 1/2 Dozen Cookies
Ingredients:
1 1/2 cups rolled oats
2 1/2 cups unbleached all-purpose flour
1 tsp. baking powder
1 tsp. baking soda
1 tsp. salt
1 cup butter
1 cup packed light brown sugar
1/2 cup sugar
3 tbsp. shortening
2 eggs
1 tsp. vanilla extract
1 1/2 cups chopped walnuts
3/4 cup semi-sweet chocolate chips
3/4 cup milk chocolate chips
3/4 cup toffee bits
Method:
Preheat oven to 350 F.
1. Pulse the oats in the food processor until finely ground. Whisk the oats with the flour, baking powder, baking soda, and salt in a medium bowl.
2. Beat the butter, brown sugar, sugar, and shortening in the bowl of a stand mixer at medium speed for 2 minutes (or until blended). Beat in the eggs and vanilla. Reduce the mixer to low speed and beat in the flour mixture. Stir in the nuts, chocolate, and toffee bits.
3. Scoop tablespoons of the batter onto a parchment-lined baking sheet. Flatten to ~1/2-inch thick. Bake 10-12 minutes or until golden brown.
Reference:
Chocolate Brickle Cookies from Cooking Pleasures magazine (unfortunately I forgot to write down the date before ripping it out of the magazine so I'm not sure which issue this was from...)
Friday, June 26, 2009
Chocolate-Raspberry Cookies
So chewy! So chocolatey! So free of rubbish you shouldn't be eating! All this and vegan, too!
These are really fantastic cookies. I can't wait to make them again with different flavours of spreadable fruit (cherry, apricot, orange marmalade with Grand Marnier or Cointreau... whatever!)
I may even add some chocolate chips or chopped nuts next time but, really, they wouldn't need them.
I didn't take a photo since my camera just landed in Texas but these cookies look remarkably like these ones: Double-Chocolate Peppermint Cookies
Makes about 2 dozen cookies
Ingredients:
1/2 cup raspberry preserves
1 cup unrefined sugar
1/3 cup canola oil
1 tsp. pure vanilla extract
1 tsp. pure almond extract (or amaretto)
1/4-1/2 tsp. Chambord (optional)
1/2 cup plus 2 tbsp. unsweetened cocoa powder
1 1/2 cups unbleached all-purpose flour
3/4 tsp. baking soda
1/4 tsp. salt
Method:
Preheat oven to 350 degrees.
1. In a large mixing bowl, combine the raspberry preserves, sugar, canola oil, vanilla, almond extract or amaretto, and Chambord.
2. In a separate mixing bowl, sift the flour, cocoa, baking soda, and salt together. Add the dry ingredients to the wet in three batches, mixing well with each addition. You may need to use your hands to kneed the dough with the last addition.
3. Roll the dough into walnut-sized balls and then flatten them with your hands into discs. Place them on a prepared cookie sheet and bake for 10 minutes. They don't spread so don't worry about placing them far apart on the sheet.
4. Remove from the oven and let the cookies cool for 5 minutes on the sheet and then transfer them to a cooling rack to cool them completely.
Reference:
Chewy Chocolate-Raspberry Cookies from Veganomicon.
The only change I really made was to add Chambord and a little amaretto when I ran out of almond extract (!) :)
I can't wait to try different flavours of these cookies!
These are really fantastic cookies. I can't wait to make them again with different flavours of spreadable fruit (cherry, apricot, orange marmalade with Grand Marnier or Cointreau... whatever!)
I may even add some chocolate chips or chopped nuts next time but, really, they wouldn't need them.
I didn't take a photo since my camera just landed in Texas but these cookies look remarkably like these ones: Double-Chocolate Peppermint Cookies
Makes about 2 dozen cookies
Ingredients:
1/2 cup raspberry preserves
1 cup unrefined sugar
1/3 cup canola oil
1 tsp. pure vanilla extract
1 tsp. pure almond extract (or amaretto)
1/4-1/2 tsp. Chambord (optional)
1/2 cup plus 2 tbsp. unsweetened cocoa powder
1 1/2 cups unbleached all-purpose flour
3/4 tsp. baking soda
1/4 tsp. salt
Method:
Preheat oven to 350 degrees.
1. In a large mixing bowl, combine the raspberry preserves, sugar, canola oil, vanilla, almond extract or amaretto, and Chambord.
2. In a separate mixing bowl, sift the flour, cocoa, baking soda, and salt together. Add the dry ingredients to the wet in three batches, mixing well with each addition. You may need to use your hands to kneed the dough with the last addition.
3. Roll the dough into walnut-sized balls and then flatten them with your hands into discs. Place them on a prepared cookie sheet and bake for 10 minutes. They don't spread so don't worry about placing them far apart on the sheet.
4. Remove from the oven and let the cookies cool for 5 minutes on the sheet and then transfer them to a cooling rack to cool them completely.
Reference:
Chewy Chocolate-Raspberry Cookies from Veganomicon.
The only change I really made was to add Chambord and a little amaretto when I ran out of almond extract (!) :)
I can't wait to try different flavours of these cookies!
Wednesday, February 4, 2009
Be Grateful for Ice Cream ;)

I am one of the world's biggest Cherry Garcia fans so I've been really wanting to try to make it at home (hubby got me the Ben and Jerry's ice cream recipe book for my birthday last year).
The ice cream is really yummy but I don't think it tastes anything like Cherry Garcia! lol :)
I do have some ideas about that so I'll have to try it again soon. First, I used dried cherries since fresh ones aren't available and when I think of canned cherries, I think of that gooey (not in a good way) cherry pie filling. Yikes! I will try it again with fresh once those are in season. Also, one of my friends suggested using some cherry brandy either in the ice cream base or just poured on top. Will have to try that one, too. :)
This version is more Coldstone than Cherry Garcia. It's a great sweet base with cherries and chocolate chunks mixed in!
Makes 1 Grateful Quart (yes, I ripped that off from the Ben & Jerry's book..)
Ingredients:
2 large eggs
3/4 cup sugar
2 cups heavy cream
1 cup milk
1/4 cup dark chocolate chunks (I just chopped chunks off a bar of chocolate)
1/4 cup cherries, chopped (I used dried but will use fresh next time)
Method:
1. Whisk the eggs and sugar in the bowl of the KA mixer using the wire whisk attachment. Turn the mixer to speed 2 and let it run for about 30 seconds or until the eggs and sugar are slightly thickened.
2. Keep the mixer running at speed 2 while you add in the heavy cream and milk. Let it run until it's all well-mixed.
3. Pour the egg-sugar-milk-cream mixture into a medium saucepan with a heavy bottom. Cook over medium heat until tiny bubbles form around the edge of the mixture and you can see steam rising from the liquid. Do not let it boil! Transfer this mixture into a glass bowl then cover and refrigerate for at least 8 hours.
4. Once the base has thoroughly chilled, attach the frozen ice cream attachment bowl to the KA mixer (make sure it has had at least 15 hours in the freezer). Turn the mixer to speed 1 (STIR). While the dasher is spinning, carefully pour the ice cream base into the ice cream freezer bowl (it's best to use a measuring jug for this part). Let the mixture stir for 15-20 minutes. Add in the chocolate chunks and cherries during the last 2 minutes of stir time.
5. Transfer the ice cream to freezer-safe containers and allow to freeze to desired consistency.
Have a grateful day ;)
References:
Based on the Cherry Garcia recipe from Ben and Jerry's Homemade Ice Cream and Dessert Book by Ben Cohen and Jerry Greenfield with Nancy J. Stevens.
I used the French Vanilla Ice Cream recipe from the little book that came with my KitchenAid ice cream maker attachment but just to figure out the cooking times (I'm really sketchy about raw egg [why do you think I love vegan baking so much?!] and the B&J book didn't cook their base).
Tuesday, February 3, 2009
Root Vegetable Enchiladas (with Mole!)
 I really need to learn how to make the “e” at the end of mole have an accent mark over the top of it because every time I type mole without it, it looks like I'm talking about eating sauce made of small animals who don't see very well! Um, no... DH loves enchiladas so I’m always looking for new and exciting vegetarian versions of this yummy treat. I really enjoyed these ones with roasted vegetables. The combination of the sweet veggies and the chocolate in the mole sauce along with the peppers was amazing! I know not everyone goes for that sweet-spicy combination but if you’re like me, you have to give these a try!
I do have to work on the cashew cream, though.. I think it needed more water! In my defense, it was my first time using nutritional yeast so maybe that’s the part that needs work! I would have tried a second batch since I really wanted to drizzle some over the top of the mole sauce but I just ran out of time… it’s hard when I’m trying to focus on a brand-new recipe while making chicken enchiladas for DH (just leave a comment if you ever want the chicken enchilada recipe – I have it saved and would be happy to share it. M always raves about it!) Next time, I’ll make the cashew cream first and just store it in the fridge. That should give me extra time to make more if needed.
On to the recipe! : )
Makes 2 very generous servings (4 enchiladas/2 each) You could almost get away with doing 1 enchilada per person and serving it with some seasoned rice, black beans, and/or salad (or some combination of those three sides). When I do enchiladas we have enchiladas and that’s it! They are just so filling!
Oh, before I go on… enchiladas freeze really well! Make a bunch; they are great to have on-hand and just pull out and re-heat when you need a quickie dinner.
Ingredients:
Jalapeno-Cashew Cream
1/2 cup raw cashews
1/2 cup water
1/2 jalapeno pepper
1-1/2 tbsp. nutritional yeast (see if you can find it in the bulk aisle - tubs of it are a bit spendy!)
1/4 tsp. salt
1/8 tsp. freshly ground black pepper
Method: 1. Place all the ingredients in a blender or food processor and pulse on the "puree" setting until smooth.
Mole Sauce
Ingredients:
2 1/4 cups vegetable broth
1 1/2 tbsp. olive oil
1/2 cup onion, chopped
1 1/2 tbsp. garlic, minced (I actually think I just used 5 cloves)
1/2 tsp. dried oregano
1/2 tsp. cumin
1/8 tsp. ground cinnamon
1 1/4 tbsp. chili powder
1 1/2 tbsp. all-purpose flour
1 1/2 oz. dark chocolate, chopped
Method:
Heat 1 1/2 tbsp. olive oil in a large saucepan over medium-low heat.
2. Add the onion, garlic, oregano, cumin, and cinnamon to the hot oil. Cover and cook until onion is almost tender (about 10 minutes). Stir occasionally during the cooking process.
3. Mix in the chili powder and flour. Stir three minutes.
4. Gradually mix in the broth and increase the heat to medium-high. Boil until reduced (it took mine about 15 or 16 minutes). Stir occasionally. Remove from the heat and stir in the chocolate.
Enchilada Filling
Ingredients:
1/3 to 1/2 cup each sweet potato, red potatoes, and parsnip (peel the parsnip and sweet potato), diced
1/2 onion, diced
1 tbsp. olive oil
1 tsp. cumin
1/4 tsp. sea salt
1/8 tsp. freshly ground black pepper
1 recipe jalapeno cashew cream (above)
Flour tortillas
1 recipe mole sauce (above)
Method:
Preheat the oven to 400 degrees. Line a cookie sheet with parchment paper.
1. Toss the vegetables, cumin, onion, olive oil, salt, and pepper together in a large bowl. Spread the veggie mixture onto the cookie sheet and roast 45-50 minutes or until they are soft and lightly browned, stirring once or twice during the roasting time. Reduce the oven heat to 350 degrees.

**Make the mole sauce while the vegetables roast.**
2. Remove the vegetables from the oven and let them cool a little. Once cooled, toss them in a large bowl with 1/2 cup of the jalapeno cashew cream. Scoop the vegetable filling into the tortillas and roll each one into an enchilada.
3. Pour a little mole sauce into the bottom of a baking dish. Place each enchilada on top of the mole. Cover the enchiladas with additional mole sauce. If desired, use the remaining cashew cream to drizzle over the mole-covered enchiladas.
4. Bake the enchiladas, uncovered, for 20 minutes in a 350 degree oven.
Reference: The jalapeno cashew cream and the enchilada filling recipes are based on "Roasted Root Vegetable Enchiladas" and "Chipotle Cashew Cream" from the Nov/Dec 2008 issue of VegNews magazine.
Changes for the enchilada filling included adding in the red potatoes and using the mole sauce in place of red or green enchilada sauce. I was going to add some corn, too, but completely forgot! Oh well... next time :)
The only change I made to the cashew cream was to use a regular un-roasted jalapeno in place of the chipotle pepper.
The mole sauce recipe is from Recipezaar. I just change it by adding a little extra chocolate and using veggie broth in place of chicken broth.
Monday, January 19, 2009
Spicy Double-Chocolate Muffins

Another success in the vegan baking department. :)
I have today off work (hence all the blog updates) so I decided to try out some new recipes. I made these and another (equally yummy) batch of muffins that I'll blog in a little bit.
These are nice and light with just enough spiciness (I actually might add just a drop more of each one next time). I didn't really notice the cayenne in the muffin I taste-tested but then again, I am one of those who loves spicy pepper with dark chocolate (mmm... mole sauce). If anything, it probably works to bring out the chocolate flavour (as would a bit of espresso or other strong coffee). The cayenne is optional so if you're a bit sketchy about hot pepper and chocolate combinations, you can leave it out. :)
The nuts and chocolate chips are a nice surprise (especially when the chips are still melty!)
This will make anywhere from 12-18 muffins
(I halved a recipe that supposedly yields 12 and got 8... I seem to have that problem with vegan baking recipes! The amounts listed below are based on the whole [yields 12 muffins] recipe).
Ingredients:
1 3/4 cups unbleached all-purpose flour
3/8 cup agave nectar
6 tbsp. unsweetened cocoa powder (check the label to make sure it is non-dairy)
2 tsp. baking powder
1/2 tsp. baking soda
2 tsp. ground cinnamon
1/4 tsp. ground cloves
1/8 tsp. cayenne pepper (you know you want to try it!)
1 tsp. salt
2 tbsp. freshly-ground flax seeds (buy them whole and grind them using a coffee grinder)
6 tbsp. water
1 cup low-fat almond milk (or other non-dairy milk: soy, hemp, rice, etc.)
1/2 cup non-hydrogenated, non-dairy butter, melted (I always like original Earth Balance)
1/2 cup non-dairy semi-sweet chocolate chips (most semi-sweet chocolate chips are dairy-free but do a quick label check to be sure)
1/4 cup finely chopped pecans
1/4 cup finely chopped walnuts
Method:
Preheat the oven to 350 degrees. Line a muffin pan with unbleached cupcake papers (or lightly grease the cups with non-dairy spread or canola oil spray).
1. Sift together the flour and cocoa powder into a large bowl. Add the baking soda, cinnamon, cloves, cayenne, and salt.
2. Whisk the ground flax and water together in a small bowl (a fork or mini whisk will do the trick). The mixture should be light and creamy.
3. In a medium bowl, mix together the flax and water mixture, almond milk, melted butter, and agave nectar. Add this combination to the dry mixture and stir until they are just combined (see those ugly pointy tops on my muffins? Those are the result of over-mixing! I'm always guilty...)
Gently stir in the chocolate chips and nuts.
4. Spoon the mixture into the muffin pan cups (it will be runny). The cups should be about 3/4 of the way full of muffin mix. Bake about 15 minutes or until a toothpick comes out clean. Let them cool in the pan for 5 minutes and then transfer them to a wire rack to cool completely.
Reference:
Based on the recipe Hearty Spicy Cocoa Muffins from The Joy of Vegan Baking.
I made these my own by subbing agave nectar for granulated sugar and ground flaxseed and water for the Ener-G egg replacer and water (flax adds healthy omega-3 fats and is a more "whole" ingredient than commercial egg replacer). I also used both pecans and walnuts (as opposed to just one or the other).
I'll try adding some dried fruit next time!
Disappearing Brownies
These are quite possibly the best fudge brownies I've ever made. They have this wonderful crispy top that adds an unexpected crunch to this otherwise very fudgy treat!
I do still love the old brownie recipe that I've used for years but something about not having to chop up chocolate (I always thought that was such a PITA) is really refreshing!
Hubby's aunt actually gave me the recipe - she found it in one of those in-flight magazines on her plane trip over Christmas (lol - of all places to find a new favourite recipe!) Unfortunately, I never found out which airline the magazine was from so that's the best I can do for a reference. Given that, I probably shouldn't be blogging these but they were so fantastic, I have to share them! ;)
These got the name since we made a pan and they disappeared within 30 minutes! I don't think the poor things had time to cool completely! :) Needless to say, we made another batch the next day (they are really easy to make). There was a joke going around that if you leave the clean, empty brownie pan out on the counter, more brownies magically appear overnight. Yeah, don't we wish! :)
I haven't tried this yet (believe me, it's on the to-bake list), but I think these would be really easy to convert to a vegan brownie recipe. As far as I can tell, all you'd have to do is to change the butter into 4 cups of non-hydrogenated vegan spread (Earth Balance is my fave) and the eggs to any egg substitute (4 eggs worth). Since they are bars, the egg subs should be pretty easy - you could use ground flax and water, Ener-G egg replacer and water, smushed up silken tofu, applesauce, bananas, or (one I've never tried but am rather intrigued by) vinegar and baking soda.
No photo, sorry! Darn things disappeared too fast! But, hey, that's just another excuse for me to make these again (and to try some of the add-ins I listed below!) :)
Ingredients:
1 cup unsalted butter, melted (2 sticks)
2/3 cup unbleached flour
2 cups granulated sugar
4 large eggs (at room temperature)
1/2 tsp. vanilla extract
3/4 cup unsweetened cocoa powder
1/2 tsp. aluminium-free baking powder
1/2 tsp. salt
Feel free to add in walnuts, pecans, chocolate chips, butterscotch chips, chopped up Heath bars (yum!), toffee bits, dried fruits, etc... (or any combination of those ingredients! I'd say 1/2 cup to 1 cup total would do it)
Ooh, how yummy would these be if you subbed in pure peppermint extract for the vanilla and then crushed up some peppermint candies and added those in? :) I also have to try this base for amaretto brownies.
Method:
Preheat oven to 350 degrees
1. Grease a 9-inch by 9-inch baking pan. I like to rub the butter wrappers on the pan so nothing is wasted. Dust the buttered pan with a little flour.
2. Whisk the sugar and melted butter together in a large bowl. Add in the eggs one at a time and then the vanilla extract.
3. In a separate bowl, blend together the flour, baking powder, cocoa, and salt. Add this mixture to the sugar and butter mixture and stir just until blended (do not overmix).
4. Spread the brownie mixture into the prepared pan. Bake 40 minutes or until a toothpick inserted in the center comes out clean.
Reference:
Oops.. see note above. Thank you airline magazine! And DH's aunt! :) I have a feeling it may have been United... or US Airways (DH might know so I may be back to update this)
The ideas for adding in all the nuts, chips, etc., subbing in the peppermint, and making these vegan were my own. At least nobody can sue me for that part! ;) Thank you to Colleen Patrick-Goudreau and her book The Joy of Vegan Baking for the baking soda and vinegar egg substitute idea.
I do still love the old brownie recipe that I've used for years but something about not having to chop up chocolate (I always thought that was such a PITA) is really refreshing!
Hubby's aunt actually gave me the recipe - she found it in one of those in-flight magazines on her plane trip over Christmas (lol - of all places to find a new favourite recipe!) Unfortunately, I never found out which airline the magazine was from so that's the best I can do for a reference. Given that, I probably shouldn't be blogging these but they were so fantastic, I have to share them! ;)
These got the name since we made a pan and they disappeared within 30 minutes! I don't think the poor things had time to cool completely! :) Needless to say, we made another batch the next day (they are really easy to make). There was a joke going around that if you leave the clean, empty brownie pan out on the counter, more brownies magically appear overnight. Yeah, don't we wish! :)
I haven't tried this yet (believe me, it's on the to-bake list), but I think these would be really easy to convert to a vegan brownie recipe. As far as I can tell, all you'd have to do is to change the butter into 4 cups of non-hydrogenated vegan spread (Earth Balance is my fave) and the eggs to any egg substitute (4 eggs worth). Since they are bars, the egg subs should be pretty easy - you could use ground flax and water, Ener-G egg replacer and water, smushed up silken tofu, applesauce, bananas, or (one I've never tried but am rather intrigued by) vinegar and baking soda.
No photo, sorry! Darn things disappeared too fast! But, hey, that's just another excuse for me to make these again (and to try some of the add-ins I listed below!) :)
Ingredients:
1 cup unsalted butter, melted (2 sticks)
2/3 cup unbleached flour
2 cups granulated sugar
4 large eggs (at room temperature)
1/2 tsp. vanilla extract
3/4 cup unsweetened cocoa powder
1/2 tsp. aluminium-free baking powder
1/2 tsp. salt
Feel free to add in walnuts, pecans, chocolate chips, butterscotch chips, chopped up Heath bars (yum!), toffee bits, dried fruits, etc... (or any combination of those ingredients! I'd say 1/2 cup to 1 cup total would do it)
Ooh, how yummy would these be if you subbed in pure peppermint extract for the vanilla and then crushed up some peppermint candies and added those in? :) I also have to try this base for amaretto brownies.
Method:
Preheat oven to 350 degrees
1. Grease a 9-inch by 9-inch baking pan. I like to rub the butter wrappers on the pan so nothing is wasted. Dust the buttered pan with a little flour.
2. Whisk the sugar and melted butter together in a large bowl. Add in the eggs one at a time and then the vanilla extract.
3. In a separate bowl, blend together the flour, baking powder, cocoa, and salt. Add this mixture to the sugar and butter mixture and stir just until blended (do not overmix).
4. Spread the brownie mixture into the prepared pan. Bake 40 minutes or until a toothpick inserted in the center comes out clean.
Reference:
Oops.. see note above. Thank you airline magazine! And DH's aunt! :) I have a feeling it may have been United... or US Airways (DH might know so I may be back to update this)
The ideas for adding in all the nuts, chips, etc., subbing in the peppermint, and making these vegan were my own. At least nobody can sue me for that part! ;) Thank you to Colleen Patrick-Goudreau and her book The Joy of Vegan Baking for the baking soda and vinegar egg substitute idea.
Sunday, January 18, 2009
Lower-Sugar Cookies

These were surprisingly very tasty. Unlike the first recipe I tried (that I found on a popular recipe website), these did not have a nasty Splenda after-taste. After that un-presentable disaster, I decided to modify a tried-and-true recipe to make them lower in sugar for a diabetic family member.
This version is also vegan but you can make them non-vegan by subbing in 1/2 cup (1 stick) butter for the non-dairy Earth Balance and 1 egg for the Ener-G substitute.
Makes about 30 cookies
Ingredients:
1 cup all-purpose flour
1/2 tsp. baking powder
1/2 tsp. salt
1 cup rolled oats
1/2 cup Earth Balance non-dairy spread
1/4 cup agave nectar (lower glycemic index than regular sugar)
1/4 cup Splenda Brown Sugar Blend
1 1/2 tsp. Ener-G egg replacer
2 tbsp. water
1/2 tsp. vanilla extract
2 cups semi-sweet chocolate chips
1/2 tsp. ground cinnamon
Method:
Preheat oven to 350 degrees. Line cookie sheets with parchment paper.
1. In a large bowl, combine the flour, baking powder, salt, oatmeal, and cinnamon. Stir well to mix. Whisk together the water and Ener-G powder until combined and slightly thickened.
2. In the bowl of a stand mixer fitted with the paddle attachment, beat together the Earth Balance, agave nectar, and brown sugar substitute until well mixed. Beat in the Ener-G mixture and the vanilla.
3. Lower the mixer speed and beat in the flour and oatmeal mixture. Add in the chocolate chips.
4. Drop tablespoons of the batter on the prepared pans. Flatten the mounds with the back of a fork.
5. Bake 12-15 minutes or until they spread and color evenly and become firm. Cool on wire racks and then store in an air-tight container.
Reference:
Based on the Chewy Oatmeal Raisin Cookies recipe from the book Cookies Unlimited by Nick Malgieri.
That's more like it...
Remember my failed attempt at thumbprint cookies with the candy cane Hershey Kisses? Well, after figuring out how to actually make thumbprint cookies, I had another go at them later that week. The results were much better! :)
(I just can't believe it took me this long to blog the new photo!)

(I just can't believe it took me this long to blog the new photo!)

Wednesday, December 17, 2008
Double-Chocolate Peppermint Cookies (Vegan!)

These are so festive :) Even though I'll take chocolate-mint anything anytime of year!
These were my first attempt at making vegan cookies. I've made quite a few other vegan sweets but those have all used egg substitutes I was familiar with. These called for a commercial egg replacer so I wasn't sure how they would turn out. It works! They were easy to make and I highly recommend these for any chocoholic, vegan or not. :)
Since they are dairy-free, they are also a good option for lactose-intolerant friends.
I made these as a special treat for my vegan sister and brother-in-law and decided to keep a couple for myself. Well, since I had some of those candy cane Hershey Kisses (bit of an impulse buy at Target last night), I figured I'd try out some thumbprint cookies with them. I have never tried making thumbprint cookies so this was a huge experiment! What do you know? I managed to screw them up a bit! Apparently the vegan baking gods did not appreciate my de-veganizing my cookies - the tops of the Kisses all burned! lol :) They still taste fine and they are just for hubby and myself so it's no big deal. They look really funny, though! Guess I gave myself a bit of bad cookie karma ;)
PS - the dough is also fantastic! And you can eat it since there are no raw eggs or other yuckies
This made 32 cookies
(I used my small cookie scoop - original recipe said it would yield 1 1/2 dozen but I always end up with more vegan goodies than the recipe states..! Nice problem to have, I suppose)
Ingredients:
1 1/2 tsp. Ener-G Egg Replacer (see photo below)
2 tbsp. water
3/4 cup non-hydrogenated, non-dairy butter (I use Earth Balance)
1/2 cup firmly packed light brown sugar (I like the Wholesome Sweeteners sugars since they are organic and fair trade)
1/2 cup granulated sugar (I use evaporated cane juice)
1 tsp. vanilla extract
1/2 tsp. peppermint extract
1 1/2 cups unbleached all-purpose flour
1/4 cup unsweetened cocoa
1 tsp. baking soda
1/4 tsp. salt
1 cup non-dairy chocolate chips (semi-sweet chips are usually OK)
Ener-G Egg Replacer:

Method:
1. Line cookie sheets with parchment paper and pre-heat the oven to 350 degrees.
2. Whisk together the egg replacer and water until it is thick and creamy. Set aside. Mine looked like whisked egg whites when it was ready (frothy). It will thicken up as it sits so don't worry if it seems too runny.
3. Cream the butter, brown sugar, and granulated sugar. Beat in the egg replacer as well as the vanilla and peppermint extracts.
4. In a separate bowl, stir together the flour, cocoa, baking soda, and salt. Add this mixture to the butter mixture. Stir well to combine and then add the chocolate chips. Mix the chips in but do not over-stir.
5. Drop rounded tablespoons of the cookie dough onto a cookie sheet. Do not try to press the blobs of dough down with a fork - it's too sticky and they come out not looking very nice (yes, I tried on one batch!)
Bake for 10-12 minutes.
Remove the cookies from the baking sheet immediately after removing from the oven and place them on a wire rack to cool.
These make great dunkers!
*If you would like to make a non-vegan version of these, simply sub 1 egg for the egg replacer. The butter amount would remain the same so you can sub in salted or unsalted butter as desired. I do recommend you make the vegan ones at least once. You'd never know they're vegan!
I know, I say that every time I post a vegan baking recipe. It's true, though!
Reference: Chocolate Chip Mint Cookies from The Joy of Vegan Baking.
Oops... ;)

Sunday, May 11, 2008
Avocado Enchiladas Redux
I actually managed to improve on the already fantastic avocado enchiladas! If you read my original avocado enchilada post, I mentioned wanting to try them with mole sauce. Well... it really works! I had actually been at a great local Mexican restaurant on Monday and they had avocado enchiladas on the menu. I was offered mole sauce with them so I was not about to pass that up! They were good (but I have to say my filling was more interesting!) - at least I knew the mole-avocado combination wouldn't be weird!
One of my friends hosted a "healthy food event" last night so I decided to make these (as well as the vegan chocolate cupcakes). I found local avocados for 33 cents each so that helped seal my decision to make this recipe.
Both items were a hit and my home-made mole turned out great!
Here's the updated avocado enchilada recipe that I used yesterday, including the mole sauce. Other than the mole, I also changed them by adding more tomato and some black beans for protein.
Yield - Makes 4 enchiladas (since we had a variety of other stuff, we cut them in half; normally this would serve 4).
Ingredients:
2 1/4 cups vegetable broth
1 1/2 tbsp. olive oil
1/2 cup onion, chopped
1 1/2 tbsp. garlic, minced (I actually think I just used 5 cloves)
1/2 tsp. dried oregano
1/2 tsp. cumin
1/8 tsp. ground cinnamon
1 1/4 tbsp. chili powder
1 1/2 tbsp. unbleached all-purpose flour
1 1/2 oz. dark chocolate, chopped
4 ripe avocados, halved and seeded (yes, 1 whole avocado per enchilada!)
1/4 red onion, finely chopped
1/2 cup cilantro, chopped roughly
Juice of 1 lime
2 tomatoes, seeded and chopped
1/2 tsp. cumin
2 cloves garlic, minced
1 jalapeno, seeded and diced
1/2 cup black beans, drained and rinsed (I might actually add more next time)
1/2 tsp. sea salt
Freshly ground black pepper
Method:
1. For the mole sauce, heat 1 1/2 tbsp. olive oil in a large saucepan over medium-low heat.
2. Add the onion, garlic, oregano, cumin, and cinnamon to the hot oil. Cover and cook until onion is almost tender (about 10 minutes). Stir occasionally during the cooking process.
3. Mix in the chili powder and flour. Stir three minutes.
4. Gradually mix in the broth and increase the heat to medium-high. Boil until reduced (it took mine about 15 or 16 minutes). Stir occasionally. Remove from the heat and stir in the chocolate.
5. While the mole sauce reduces, prepare the enchilada filling. Preheat oven to 350 degrees. Spray a glass baking dish with cooking spray. Smush up the avocado in a glass bowl. Add the onion, garlic, cilantro, cumin, tomatoes, jalapeno, lime juice, black beans, and salt and pepper. Mix together to create a guacamole.
6. Spoon the avocado mixture into the tortillas and roll them up. Place tortillas in the prepared baking dish and cover with mole sauce. Bake in a 350-degree oven for 20 minutes.
Reference:
Based, rather loosely, on Deena Kastor's Avocado Enchilada recipe.
I found the mole sauce recipe on RecipeZaar. My only change was to add a little extra chocolate after tasting it. Oh, I also changed the chicken broth to vegetable broth!
One of my friends hosted a "healthy food event" last night so I decided to make these (as well as the vegan chocolate cupcakes). I found local avocados for 33 cents each so that helped seal my decision to make this recipe.
Both items were a hit and my home-made mole turned out great!
Here's the updated avocado enchilada recipe that I used yesterday, including the mole sauce. Other than the mole, I also changed them by adding more tomato and some black beans for protein.
Yield - Makes 4 enchiladas (since we had a variety of other stuff, we cut them in half; normally this would serve 4).
Ingredients:
2 1/4 cups vegetable broth
1 1/2 tbsp. olive oil
1/2 cup onion, chopped
1 1/2 tbsp. garlic, minced (I actually think I just used 5 cloves)
1/2 tsp. dried oregano
1/2 tsp. cumin
1/8 tsp. ground cinnamon
1 1/4 tbsp. chili powder
1 1/2 tbsp. unbleached all-purpose flour
1 1/2 oz. dark chocolate, chopped
4 ripe avocados, halved and seeded (yes, 1 whole avocado per enchilada!)
1/4 red onion, finely chopped
1/2 cup cilantro, chopped roughly
Juice of 1 lime
2 tomatoes, seeded and chopped
1/2 tsp. cumin
2 cloves garlic, minced
1 jalapeno, seeded and diced
1/2 cup black beans, drained and rinsed (I might actually add more next time)
1/2 tsp. sea salt
Freshly ground black pepper
Method:
1. For the mole sauce, heat 1 1/2 tbsp. olive oil in a large saucepan over medium-low heat.
2. Add the onion, garlic, oregano, cumin, and cinnamon to the hot oil. Cover and cook until onion is almost tender (about 10 minutes). Stir occasionally during the cooking process.
3. Mix in the chili powder and flour. Stir three minutes.
4. Gradually mix in the broth and increase the heat to medium-high. Boil until reduced (it took mine about 15 or 16 minutes). Stir occasionally. Remove from the heat and stir in the chocolate.
5. While the mole sauce reduces, prepare the enchilada filling. Preheat oven to 350 degrees. Spray a glass baking dish with cooking spray. Smush up the avocado in a glass bowl. Add the onion, garlic, cilantro, cumin, tomatoes, jalapeno, lime juice, black beans, and salt and pepper. Mix together to create a guacamole.
6. Spoon the avocado mixture into the tortillas and roll them up. Place tortillas in the prepared baking dish and cover with mole sauce. Bake in a 350-degree oven for 20 minutes.
Reference:
Based, rather loosely, on Deena Kastor's Avocado Enchilada recipe.
I found the mole sauce recipe on RecipeZaar. My only change was to add a little extra chocolate after tasting it. Oh, I also changed the chicken broth to vegetable broth!
Saturday, May 10, 2008
Strawberry Chocolate Chip Bread
 I managed to find a really good deal on some local strawberries last week but, since I'm the only one in the house who will eat them (!), I needed a quick way to use them up. Strawberry bread it was! :) This was a recipe posted by one of the girls on the Nest - she doesn't have a blog so I'm *publishing* it for her.
My changes:
*The original recipe would have made 2 loaves (9x5x3-inch). I halved it so that's what is reflected here.
*I omitted 1/4 cup chopped nuts (didn't have any on-hand) and used 1/2 chocolate chips instead.
*Rather than halve the amount of vanilla extract, I just left it at 1/2 tsp.
*I also kept the full amount of strawberries instead of halving that.
I'd love to try this with a mix of strawberries and raspberries next time!
Ingredients:
1/4 cup unsalted butter (1/2 stick)
1/2 cup sugar
2 large eggs
1/2 tsp. vanilla extract
1 3/4 cups unbleached all-purpose flour
2 tsp. aluminium-free baking powder
1/2 tsp. salt
1/2 cup milk (I used fat-free)
1 cup chopped fresh strawberries
1/2 cup semi-sweet chocolate chips
Method:
Preheat the oven to 350 degrees.
1. Lightly grease a 9x5x3-inch loaf pan. Set aside.
2. In a large bowl, cream the butter and sugar. Mix in the eggs and vanilla.
3. In another bowl, stir together the flour, baking powder, and salt. Add the dry ingredients to the egg mixture alternatively with the milk, beating until combined after each addition. Use a wooden spoon to stir in the strawberries and chocolate chips. Pour into the prepared pan.
4. Bake for 50-55 minutes or until a toothpick inserted in the center comes out clean.
5. Cool on wire racks for 10 minutes. Remove from the pan and cool completely.

Reference:
Thank-you, msT2B on the Nest! This is based on her recipe for Strawberry Bread.

Friday, April 11, 2008
Vegan Chocolate Cupcakes 2
I've made vegan chocolate cupcakes before but this recipe is quite different! The first ones were super yummy but they had quite a bit of molasses in them and tasted a lot like chocolate gingerbread! Not a problem for me but other people may be a bit weirded out by that! These are a lot more traditional and are some of the most moist cupcakes I have ever had! You would never know these were vegan if you just grabbed one and tried it! :)
It's our nephew's first birthday tomorrow and I was asked to make a batch of vegan cupcakes for the party. Originally, I had planned to make 1 batch of the molasses ones and 1 batch of these but I decided after some thought just to go with these.
This is also my first time using agave nectar as a sweetener - I'm sold! This stuff is totally natural, 100% plant-based, and has a lower glycemic index than regular sugar. It also makes a wonderful vegan substitute for honey. You can mix in into any baking recipe in place of granulated sugar (the ratio is 3/4 cup agave nectar to 1 cup sugar) or stir it into tea in place of honey.
I didn't make the frosting but I'll include the recipe just in case you would like to try it - I've had it before and it is very tasty! Good excuse to satisfy your curiosity and buy a carton of soy milk. :)
PS (and then I swear I will get to the recipe!): The uncooked batter is soooo tasty! :) Best part about vegan baking, really, you get to lick the spoon! And the whisk, and any that drips on the counter, and the spatula... ;)
Here's the recipe - I got this from the mother of one of my students. My changes are in green.

Makes 24 cupcakes
Ingredients:
2 cups water
1 1/2 cups agave nectar (or 2 cups sugar)
1/2 cup vegetable oil
2 tbsp. white or cider vinegar or freshly squeezed lemon juice
1/2 cup applesauce (I made some and used that - see tip below!)
1 tbsp. pure vanilla extract
3 cups unbleached all-purpose flour
2/3 cup unsweetened cocoa powder (yeay for chocolate being a superfood! in moderation, of course!)
2 tsp. baking soda
1 tsp. salt
For the frosting:
3 cups powdered sugar (you can get some that is "vegan")
2/3 cup unsweetened cocoa
1/2 cup vegan buttery spread (Earth Balance works well) or vegetable oil
1/3 cup vanilla soy or rice milk
1 tsp. pure vanilla extract
Optional fresh raspberries, strawberries, or edible flowers as a garnish
Method:
1. Preheat the oven to 350 degrees. Line 2 cupcake pans with cupcake papers.
2. Sift the flour and cocoa into a large bowl. Add the baking soda and salt and stir until combined. If you're using dry sugar, mix it in with these ingredients.
3. In a separate bowl, combine the agave nectar (if using it), water, oil, lemon juice, applesauce, and vanilla. Stir well. Pour the water mixture into the dry mixture, whisking vigourously until the mixture is smooth and free of lumps.
4. Spoon the batter into the cupcake liners (mine was really runny! This is OK). Bake at 350 degrees for 15-20 minutes (mine only needed 15) or until a toothpick inserted into the center comes out clean.
5. To prepare the frosting, blend powdered sugar and cocoa. Melt the buttery spread and then add it, along with the soy milk and vanilla, to the sugar and cocoa mixture. Beat until smooth. Frost cooled cupcakes and garnish if desired.
**Note: You can also make this into a layer cake. Use the same amounts as above but place the completed batter into 2 9-inch round cake pans or 1 9x13-inch pan coated with cooking spray. Bake these cakes for 25-30 minutes at 350 (or until a toothpick comes out clean).
**Applesauce note: So I made this really yummy applesauce yesterday to put into these cupcakes. I kept telling myself "OK, you'll need to give this a quick spin in the food processor so it's not lumpy." Yeah, guess what blondie here forgot to do?! :) Took me a minute to figure out why my batter was lumpy, too! I thought something weird had happened and the agave had reacted with the cocoa or something. :) No, I just had a blonde moment. I was a bit worried the cakes would have weird chunks of apple in them but you can hardly tell.. in the future, or if you try this, make sure and puree the applesauce before adding it to the batter.
Additionally, the applesauce is actually totally optional but it really does add to the moistness of these cakes so it is worth it to throw it in if you have some. It's also super-quick to make! :)
Reference:
I found this in the Fresh Mama's cookbook. The recipe in that book was inspired by one from The Passionate Vegetarian.
It's our nephew's first birthday tomorrow and I was asked to make a batch of vegan cupcakes for the party. Originally, I had planned to make 1 batch of the molasses ones and 1 batch of these but I decided after some thought just to go with these.
This is also my first time using agave nectar as a sweetener - I'm sold! This stuff is totally natural, 100% plant-based, and has a lower glycemic index than regular sugar. It also makes a wonderful vegan substitute for honey. You can mix in into any baking recipe in place of granulated sugar (the ratio is 3/4 cup agave nectar to 1 cup sugar) or stir it into tea in place of honey.
I didn't make the frosting but I'll include the recipe just in case you would like to try it - I've had it before and it is very tasty! Good excuse to satisfy your curiosity and buy a carton of soy milk. :)
PS (and then I swear I will get to the recipe!): The uncooked batter is soooo tasty! :) Best part about vegan baking, really, you get to lick the spoon! And the whisk, and any that drips on the counter, and the spatula... ;)
Here's the recipe - I got this from the mother of one of my students. My changes are in green.

Makes 24 cupcakes
Ingredients:
2 cups water
1 1/2 cups agave nectar (or 2 cups sugar)
1/2 cup vegetable oil
2 tbsp. white or cider vinegar or freshly squeezed lemon juice
1/2 cup applesauce (I made some and used that - see tip below!)
1 tbsp. pure vanilla extract
3 cups unbleached all-purpose flour
2/3 cup unsweetened cocoa powder (yeay for chocolate being a superfood! in moderation, of course!)
2 tsp. baking soda
1 tsp. salt
For the frosting:
3 cups powdered sugar (you can get some that is "vegan")
2/3 cup unsweetened cocoa
1/2 cup vegan buttery spread (Earth Balance works well) or vegetable oil
1/3 cup vanilla soy or rice milk
1 tsp. pure vanilla extract
Optional fresh raspberries, strawberries, or edible flowers as a garnish
Method:
1. Preheat the oven to 350 degrees. Line 2 cupcake pans with cupcake papers.
2. Sift the flour and cocoa into a large bowl. Add the baking soda and salt and stir until combined. If you're using dry sugar, mix it in with these ingredients.
3. In a separate bowl, combine the agave nectar (if using it), water, oil, lemon juice, applesauce, and vanilla. Stir well. Pour the water mixture into the dry mixture, whisking vigourously until the mixture is smooth and free of lumps.
4. Spoon the batter into the cupcake liners (mine was really runny! This is OK). Bake at 350 degrees for 15-20 minutes (mine only needed 15) or until a toothpick inserted into the center comes out clean.
5. To prepare the frosting, blend powdered sugar and cocoa. Melt the buttery spread and then add it, along with the soy milk and vanilla, to the sugar and cocoa mixture. Beat until smooth. Frost cooled cupcakes and garnish if desired.
**Note: You can also make this into a layer cake. Use the same amounts as above but place the completed batter into 2 9-inch round cake pans or 1 9x13-inch pan coated with cooking spray. Bake these cakes for 25-30 minutes at 350 (or until a toothpick comes out clean).
**Applesauce note: So I made this really yummy applesauce yesterday to put into these cupcakes. I kept telling myself "OK, you'll need to give this a quick spin in the food processor so it's not lumpy." Yeah, guess what blondie here forgot to do?! :) Took me a minute to figure out why my batter was lumpy, too! I thought something weird had happened and the agave had reacted with the cocoa or something. :) No, I just had a blonde moment. I was a bit worried the cakes would have weird chunks of apple in them but you can hardly tell.. in the future, or if you try this, make sure and puree the applesauce before adding it to the batter.
Additionally, the applesauce is actually totally optional but it really does add to the moistness of these cakes so it is worth it to throw it in if you have some. It's also super-quick to make! :)
Reference:
I found this in the Fresh Mama's cookbook. The recipe in that book was inspired by one from The Passionate Vegetarian.
Wednesday, February 6, 2008
Better-Than-Sex Cake

Well, I'm not sure I'd say it was that good! ;) This was another thing I decided to try out for the Superbowl party. Again, I got this from a post someone left on the Nest but I can't remember her name (same person who posted the crack dip last week - they were in the same post!) Oh well... I was never accused of being perfect ;)
Here's how I made it (it is slightly different to the original version)
Ingredients:
1 chocolate cake (recipe below)
3/4 cup caramel topping (I used jarred caramel ice-cream topping. I'll try just melting some caramels and using those next time)
3/4 cup sweetened condensed milk (I'm really not sure why I needed this. I'm going to skip it next time)
1 Symphony bar - the one with toffee bits and almonds
1 cup heavy whipping cream
Method:
1. Bake chocolate cake according to recipe below.
2. Leave the cake in the baking pan. While it is still warm, poke small holes in the cake using a toothpick. Drizzle the caramel sauce over the cake.
3. Let the cake stand to cool. Whip up the heavy whipping cream and then coat the top of the cake with the whipped cream. Sprinkle with chopped up pieces of the chocolate bar.
4. Refrigerate until you are ready to serve the cake. It's great with a scoop of vanilla ice-cream :)
Here's the chocolate cake recipe I used. It's the cake base from "Chocolate Cake with Peanut Butter Frosting" from the Land O'Lakes Baking book.
Ingredients:
1 2/3 cups sugar
3/4 cup unsalted butter, softened
3 eggs
1 tsp. vanilla
2 cups all-purpose flour
2/3 cup unsweetened cocoa
1 1/4 tsp. baking soda
1/2 tsp. baking powder
1/2 tsp. salt
1 1/3 cups milk
Method:
Preheat oven to 350 degrees
1. Grease and lightly flour a 13x9x2-inch baking dish (a lasagna dish works perfectly!)
2. Combine the sugar and butter in the bowl of a stand mixer or other large bowl. Beat until creamy. Add the eggs and vanilla; continue beating until well-mixed. Add flour, cocoa, baking powder, baking soda, and salt to butter mixture alternatively with the milk (I put all the dry ingredients in a separate bowl then added the dry and the milk a little at a time). Beat just until blended.
3. Pour the batter into the prepared pan. Bake 30-40 minutes until a toothpick inserted in the center comes out clean.
Monday, December 10, 2007
Blondies
Confession: I have never even tried a blondie before but have been intrigued, if you will, by them for some time... maybe it's a blond thing? Anyway, I bought a bunch (ie: too many) butterscotch chips over the weekend and needed a way to use them.
I read some blondie recipes thinking they would require butterscotch chips only to find that they all said chocolate chips... well humph! I really wanted to use the butterscotch chips but figured a butterscotch-flavoured bar plus butterscotch chips would be a bit of butterscotch overload (I know, hard to imagine!) So, I sort of adjusted one to use both semi-sweet chocolate chips and some of the butterscotch chips. Here's what I ended up with:
This is enough for an 8- or 9-inch baking pan (mine is 8x8). It will yield about 18 bar cookies. You can double this if needed.
Ingredients:
1 cup packed brown sugar
1/3 cup butter
1 egg
1 tsp. vanilla
1 cup all-purpose flour
1/2 tsp. baking powder
1/8 tsp. baking soda
1/4 cup butterscotch chips
1/4 cup semi-sweet chocolate chips (yeay! Ghiradelli were on sale!)
1/2 cup chopped walnuts
Method:
Preheat oven to 350 degrees F.
1. Grease an 8- or 9-inch baking pan; set aside. In a medium saucepan, heat the brown sugar and butter over medium heat until the sugar dissolves. You will need to stir it constantly. Allow this to cool slightly before adding the egg (you do not want butterscotch scrambled eggs!). Stir in the egg and then add the vanilla. Stir in flour, baking soda, and baking powder but do not over-mix. Fold in the nuts and chips.
2. Spread the batter into the prepared baking pan. Bake in a 350 degree oven for 20-25 minutes (adjust the time to 25-30 if using a larger pan) or until a toothpick inserted in the center comes out clean. Cool slightly on a wire rack. Cut into bars while still slightly warm.
Reference:
I used several recipes to create this one! First, I found blondie recipes in the Better Homes and Gardens New Cook Book as well as Baking Illustrated. I mostly used the BH&G book but consulted the Baking Illustrated to make sure I really didn't have to just sprinkle the nuts and chips on top of the un-baked bar mixture - sure enough, I could mix them in. I also found this recipe on BakingBlonde's Blonde Ambition in the Kitchen blog which suggested using butterscotch chips.
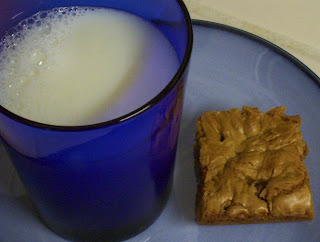
Happiness is a warm cookie and a glass of milk.
I read some blondie recipes thinking they would require butterscotch chips only to find that they all said chocolate chips... well humph! I really wanted to use the butterscotch chips but figured a butterscotch-flavoured bar plus butterscotch chips would be a bit of butterscotch overload (I know, hard to imagine!) So, I sort of adjusted one to use both semi-sweet chocolate chips and some of the butterscotch chips. Here's what I ended up with:
This is enough for an 8- or 9-inch baking pan (mine is 8x8). It will yield about 18 bar cookies. You can double this if needed.
Ingredients:
1 cup packed brown sugar
1/3 cup butter
1 egg
1 tsp. vanilla
1 cup all-purpose flour
1/2 tsp. baking powder
1/8 tsp. baking soda
1/4 cup butterscotch chips
1/4 cup semi-sweet chocolate chips (yeay! Ghiradelli were on sale!)
1/2 cup chopped walnuts
Method:
Preheat oven to 350 degrees F.
1. Grease an 8- or 9-inch baking pan; set aside. In a medium saucepan, heat the brown sugar and butter over medium heat until the sugar dissolves. You will need to stir it constantly. Allow this to cool slightly before adding the egg (you do not want butterscotch scrambled eggs!). Stir in the egg and then add the vanilla. Stir in flour, baking soda, and baking powder but do not over-mix. Fold in the nuts and chips.
2. Spread the batter into the prepared baking pan. Bake in a 350 degree oven for 20-25 minutes (adjust the time to 25-30 if using a larger pan) or until a toothpick inserted in the center comes out clean. Cool slightly on a wire rack. Cut into bars while still slightly warm.
Reference:
I used several recipes to create this one! First, I found blondie recipes in the Better Homes and Gardens New Cook Book as well as Baking Illustrated. I mostly used the BH&G book but consulted the Baking Illustrated to make sure I really didn't have to just sprinkle the nuts and chips on top of the un-baked bar mixture - sure enough, I could mix them in. I also found this recipe on BakingBlonde's Blonde Ambition in the Kitchen blog which suggested using butterscotch chips.

Happiness is a warm cookie and a glass of milk.
Monday, December 3, 2007
Grand Marnier Cupcakes

If you like orange and chocolate together, you have GOT to try these! They are so yummy (I would know, I'm eating one as I type this blog entry!)
I made these for the bridal shower I co-hosted on Saturday. I thought they were perfect since the wedding colours are pink, gold, and chocolate brown - these pretty little cakes incorporated the gold and brown quite nicely.
If you don't have Grand Marnier (or you don't drink/use alcohol), you can use orange juice. I got really lucky and found just enough left in a bottle of GM at my parents' house :) Another tip, if you have a good liquor store nearby or a BevMo, you can sometimes find the mini bottles of Grand Marnier. So much cheaper than buying a huge one! Unless, of course, you like to add it to your margaritas! ;)
These make me think of Christmas - we always get those Chocolate Oranges for Christmas (English thing...) and these have that yummy chocolate-orange combination. I might have to throw down the cash for my own bottle of GM (instead of mooching off mum and dad!) and make some for Christmas Eve!
Makes 12 Cupcakes
Cupcakes
Ingredients:
6 tbsp. unsalted butter, softened
3/4 cup sugar
1 egg
1 tbsp. finely grated orange peel
1 tsp. Grand Marnier
1 1/2 cups all-purpose flour
1/2 tsp. baking powder
1/2 tsp. baking soda
1/2 tsp. salt
1 cup sour cream
Glaze:
1/3 cup sugar
2 tbsp. fresh orange juice
2 tbsp. Grand Marnier
Topping:
3 oz. semi-sweet chocolate, coarsely chopped
1/2 tsp. vegetable shortening
Method:
1. Heat the oven to 350 degrees. Line a regular muffin pan with liners.
2. In a large bowl, beat the butter and 3/4 cup sugar at medium speed 5-6 minutes or until light and fluffy. Beat in one egg, 1 tbsp. orange peel, and 1 tsp. Grand Marnier.
3. In a medium bowl, stir together the flour, baking powder, baking soda, and salt. At low speed, beat sour cream into the butter mixture alternatively with the flour mixture. Spoon the batter into the muffin liners, filling two-thirds full (an ice-cream scoop is your best friend for this!)
4. Bake the cupcakes 20-25 minutes or until golden brown and a toothpick inserted in the center comes out clean. Remove cupcakes from the pan. Cool completely on a wire rack.
5. While the cupcakes cool, make the glaze. Heat 1/3 cup sugar and orange juice in a small saucepan over medium heat until sugar dissolves. Remove from the heat and stir in 2 tbsp. Grand Marnier.
6. Poke holes in the top of each cupcake using a toothpick. Using a pastry brush, brush the tops of each cake liberally with the Grand Marnier glaze.
7. Now you will make the chocolate topping. Place the chocolate in a small heavy Zip-Lock bag; add shortening and seal. Place the bag in a pan of simmering water and turn off the heat. Allow the bag to sit for several minutes; remove from the water. Smooth melted chocolate by working the bag with your hands. Cool 5 minutes. Cut off a tiny corner of the bag; drizzle chocolate over the cupcakes.
Tuesday, August 7, 2007
Fudge Glaze for Brownies
This is also posted at the end of my original brownie recipe but here it is again to make it a little easier to find :) I realized I promised to include it with the amaretto brownies recipe and then never did! oops...
Enough to coat 1 9-inch pan of brownies (I usually make a little less and just "drizzle" it over the bars before cutting them).
Ingredients:
1 oz. unsweetened or semi-sweet chocolate
3 tbsp. butter
1 cup powdered sugar
1 tsp. vanilla extract (for the amaretto brownies use almond extract instead!)
1-3 tbsp. warm milk
Method:
1. Melt butter and chocolate in a small saucepan. Blend in sugar and vanilla with a wire whisk. Add enough milk to make a smooth, spreadable glaze.
2. Spread or drizzle over cool brownies.
This would probably be good drizzled over cupcakes or fruit (wonder what it's like on ice cream?!)
Enough to coat 1 9-inch pan of brownies (I usually make a little less and just "drizzle" it over the bars before cutting them).
Ingredients:
1 oz. unsweetened or semi-sweet chocolate
3 tbsp. butter
1 cup powdered sugar
1 tsp. vanilla extract (for the amaretto brownies use almond extract instead!)
1-3 tbsp. warm milk
Method:
1. Melt butter and chocolate in a small saucepan. Blend in sugar and vanilla with a wire whisk. Add enough milk to make a smooth, spreadable glaze.
2. Spread or drizzle over cool brownies.
This would probably be good drizzled over cupcakes or fruit (wonder what it's like on ice cream?!)
Amaretto Brownies, Take II (Fudge)
 Those amaretto brownies I made last week were really good but I do really prefer fudge brownies to the more cake-like ones :) So, I have decided to give them another shot! I was actually going to make them tonight but discovered I had frozen my leftover almond paste so those will have to wait! I'm just going to do some kind of combination of my regular brownie recipe and the amaretto brownie recipe and see what I come up with. I hope they turn out OK! I'll come back tomorrow after I make them and let you know how they turn out/post the recipe if they are actually blog-worthy! And if not, then I still have the good cake amaretto brownies :)
Update (Wednesday): They worked!! Woohoo!! :) These are so good, even better than the cake ones which is what I hoped/suspected.
Here is the recipe I used/created for the fudge amaretto brownies:
Ingredients:
2 oz. unsweetened chocolate, cut up
1/2 cup (1 stick) unsalted butter
1 cup sugar
1/4 cup almond paste
1 tsp. vanilla extract
2 eggs
1 tbsp. amaretto
1/2 tsp. salt
1/2 tsp. aluminium-free baking powder
2/3 cup unbleached all-purpose flour
Method:
1. Preheat oven to 350 degrees. Grease an 8- or 9-inch square pan.
2. In a large saucepan, melt the butter, chocolate, and almond paste over low heat, stirring constantly. Remove from heat and cool slightly.
3. Blend in sugar, vanilla, and amaretto. Beat in eggs one at a time. Stir in salt, baking powder, and flour.
4. Bake 20-25 minutes until the brownies are set in the center (test with a toothpick). Be sure not to overbake them. Allow the brownies to cool and cut into squares. If desired, you can spread or drizzle the cooled brownies with the fudge glaze.
Enjoy! I bet these would be really good with a cup of coffee that has some amaretto stirred into it!

Tuesday, July 31, 2007
Amaretto Brownies
I usually make these very fudgy chocolate brownies which I think are the best brownies I've ever tasted... might be a bit biased, but they are damn good! Anyway, being the huge brownie fan that I am, I have been on this "must find new brownie recipes" kick lately. I'm also a huge amaretto fan (well, almonds in general fan) so you can imagine my excitement when I found this! I almost started turning cartwheels down the hallway! ;) That would be quite a sight - I think I haven't done a cartwheel since I was 14...
Anyway, these are a little more on the cake brownie side, but they are still really good! DH tried one and said "wow, did you put a whole bottle of amaretto in these things?!" No, honey, that's just 2 tbsp. and a big hunk of almond paste! ;) Yes, I was eating the almond paste straight from the tube.. maybe it's a good thing that stuff is $8 for a tiny little tube! Prevent me from eating it so much!
This will make 48 brownies - I actually cut the recipe in half which is usually not a good idea! However, seemed to work Ok for these!
Ingredients:
1 cup sugar
3/4 cup butter
1/2 of an 8-ounce tube of almond paste (works out to be about 1/2 cup)
1/2 cup unsweetened cocoa powder
2 eggs
2 tbsp. amaretto or milk (now who on earth will sub milk for amaretto?! If you do have to sub milk, you could maybe add some almond extract to it...)
1 tsp. vanilla
1 1/4 cups unbleached all-purpose flour
1 tsp. aluminium-free baking powder
1/4 tsp. baking soda
1 cup milk
Optional: fudge frosting (I'll make sure I post the recipe I use) and some chopped almonds to use as a topping
Method:
Preheat oven to 350 degrees
1. Grease a 15x10x1-inch baking pan and set it aside. In a pan, heat the sugar, butter, almond paste, and cocoa powder over medium heat until the butter is melted. I also used a wooden spoon to "smush" the almond paste around until it was all melted, too. Remove from the heat and cool slightly (we are not going for amaretto scrambled eggs here!) Add the eggs, amaretto, and vanilla; beat with a wooden spoon just until combined.
2. Combine flour, baking powder, and baking soda. Add the flour mixture and milk alternatively to the chocolate mixture, beating after each addition.
3. Pour the batter into the prepared pan. Bake for 20 minutes or until a toothpick inserted near the center comes out clean (mine needed about 23 mins). Cool on a wire rack for 2 hours. If desired, frost with fudge frosting and sprinkle with chopped or sliced almonds. Cut into bars.
Reference:
I found this in the Better Homes and Gardens New Cook Book.
Better Homes and Gardens Test Kitchen (1996). Better Homes and Gardens New Cook Book. Meredith Publishing Group: Des Moines, IA.
Anyway, these are a little more on the cake brownie side, but they are still really good! DH tried one and said "wow, did you put a whole bottle of amaretto in these things?!" No, honey, that's just 2 tbsp. and a big hunk of almond paste! ;) Yes, I was eating the almond paste straight from the tube.. maybe it's a good thing that stuff is $8 for a tiny little tube! Prevent me from eating it so much!
This will make 48 brownies - I actually cut the recipe in half which is usually not a good idea! However, seemed to work Ok for these!
Ingredients:
1 cup sugar
3/4 cup butter
1/2 of an 8-ounce tube of almond paste (works out to be about 1/2 cup)
1/2 cup unsweetened cocoa powder
2 eggs
2 tbsp. amaretto or milk (now who on earth will sub milk for amaretto?! If you do have to sub milk, you could maybe add some almond extract to it...)
1 tsp. vanilla
1 1/4 cups unbleached all-purpose flour
1 tsp. aluminium-free baking powder
1/4 tsp. baking soda
1 cup milk
Optional: fudge frosting (I'll make sure I post the recipe I use) and some chopped almonds to use as a topping
Method:
Preheat oven to 350 degrees
1. Grease a 15x10x1-inch baking pan and set it aside. In a pan, heat the sugar, butter, almond paste, and cocoa powder over medium heat until the butter is melted. I also used a wooden spoon to "smush" the almond paste around until it was all melted, too. Remove from the heat and cool slightly (we are not going for amaretto scrambled eggs here!) Add the eggs, amaretto, and vanilla; beat with a wooden spoon just until combined.
2. Combine flour, baking powder, and baking soda. Add the flour mixture and milk alternatively to the chocolate mixture, beating after each addition.
3. Pour the batter into the prepared pan. Bake for 20 minutes or until a toothpick inserted near the center comes out clean (mine needed about 23 mins). Cool on a wire rack for 2 hours. If desired, frost with fudge frosting and sprinkle with chopped or sliced almonds. Cut into bars.
Reference:
I found this in the Better Homes and Gardens New Cook Book.
Better Homes and Gardens Test Kitchen (1996). Better Homes and Gardens New Cook Book. Meredith Publishing Group: Des Moines, IA.
Subscribe to:
Posts (Atom)