Another way to spiffy up bananas.
Serves 2-3
Ingredients:
Chocolate Sauce
3/8 cup heavy whipping cream
3 oz. semi-sweet chocolate, chopped
1/4 tsp. cinnamon
1/8 tsp. ground cloves
1/2 tsp. vanilla extract
Bananas
2-3 small bananas
1 1/2 tbsp. butter or buttery spread
1 1/2 tbsp. packed brown sugar
1 tbsp. rum
1/2 tbsp. tequila
Ice cream
Method:
1. Make the chocolate sauce by combining the cream, chocolate, cinnamon, and cloves in a heavy-bottomed saucepan. Cook over low heat until the chocolate is melted. Do not allow the mixture to boil. Stir in the vanilla and remove from the heat. The sauce can be made up to 4 days ahead. Just cover and refrigerate it until ready to use.
2. Cut the bananas crosswise in half. Melt the butter in a large skillet over medium heat. Increase the heat to high and add the bananas and brown sugar. Cook 2 minutes, stirring occasionally, until the bananas are soft and the sugar has created a syrupy sauce. Add the rum and tequila and boil 1-2 minutes or until slightly thickened.
3. Scoop ice cream into bowls and surround it with the banana mixture. Drizzle with the chocolate sauce and enjoy immediately.
Reference:
Banana Sundaes with Mexican Chocolate Sauce from the August/September 2001 issue of Cooking Pleasures.
Showing posts with label Dessert. Show all posts
Showing posts with label Dessert. Show all posts
Monday, August 10, 2009

Saturday, August 8, 2009
Proof I'll use avocado for anything...
Another winner in the vegan cupcake category. :) These aren't too much different from the other vegan chocolate cupcakes I've made (I really do need to branch out and try other flavours of vegan cupcake) but they have an ingredient that makes them pretty special - AVOCADO!
Yes, my favourite fruit stars in these hunks of chocolately love.
The avocado works as a great substitute for the egg and most of the oil/butter. Since I knew we wouldn't be eating them all at the same time, I skipped a glaze or icing but I'll put a link at the bottom to the original recipe that includes a glaze idea. In the meantime, I'll be working on coming up with a vegan-approved topping that doesn't involve tofu...
Will have to try these again soon using applesauce in place of the oil and adding some semi-sweet chocolate chips (with the tofu-free glaze, of course!) :)
Makes 12 cupcakes
Ingredients:
1 1/2 cups unbleached all-purpose flour
3/4 cup unsweetened cocoa powder
1 tsp. aluminium-free baking powder
3/4 tsp. baking soda
3/4 tsp. salt
1 avocado, pitted and peeled (i.e.: scooped out of the shell)
1 cup pure maple syrup
3/4 cup plain non-dairy milk
1/3 cup canola oil
2 tsp. vanilla extract
12 unbleached muffin tin liners
Method:
1. Preheat oven to 350 F and line cupcake pan with liners.
Sift the flour, cocoa powder, baking powder, baking soda, and salt together in a large mixing bowl. Use a whisk to combine them.
2. Puree the avocado in a food processor or blender until smooth. Add the maple syrup, milk, oil, and vanilla extract and continue to blend until the mixture is creamy. Use the whisk to combine this concoction with the dry ingredients.
3. Spoon the batter into the prepared cupcake pan. Bake 20-25 minutes or until a toothpick inserted in the center comes out clean. Allow to cool and then decorate if desired.
Reference:
Here's a link to the original recipe "Glazed Chocolate-Avocado Cupcakes" from the September 2008 issue of Vegetarian Times. You can find the glaze recipe there.
Yes, my favourite fruit stars in these hunks of chocolately love.
The avocado works as a great substitute for the egg and most of the oil/butter. Since I knew we wouldn't be eating them all at the same time, I skipped a glaze or icing but I'll put a link at the bottom to the original recipe that includes a glaze idea. In the meantime, I'll be working on coming up with a vegan-approved topping that doesn't involve tofu...
Will have to try these again soon using applesauce in place of the oil and adding some semi-sweet chocolate chips (with the tofu-free glaze, of course!) :)
Makes 12 cupcakes
Ingredients:
1 1/2 cups unbleached all-purpose flour
3/4 cup unsweetened cocoa powder
1 tsp. aluminium-free baking powder
3/4 tsp. baking soda
3/4 tsp. salt
1 avocado, pitted and peeled (i.e.: scooped out of the shell)
1 cup pure maple syrup
3/4 cup plain non-dairy milk
1/3 cup canola oil
2 tsp. vanilla extract
12 unbleached muffin tin liners
Method:
1. Preheat oven to 350 F and line cupcake pan with liners.
Sift the flour, cocoa powder, baking powder, baking soda, and salt together in a large mixing bowl. Use a whisk to combine them.
2. Puree the avocado in a food processor or blender until smooth. Add the maple syrup, milk, oil, and vanilla extract and continue to blend until the mixture is creamy. Use the whisk to combine this concoction with the dry ingredients.
3. Spoon the batter into the prepared cupcake pan. Bake 20-25 minutes or until a toothpick inserted in the center comes out clean. Allow to cool and then decorate if desired.
Reference:
Here's a link to the original recipe "Glazed Chocolate-Avocado Cupcakes" from the September 2008 issue of Vegetarian Times. You can find the glaze recipe there.
Monday, August 3, 2009
Time for Tea

These are one of those quintessential English tea-time treats.
I can remember making these in home economics in primary and secondary school and they have been a life-long favourite of mine.
I recently re-stumbled across an old recipe and then found another recipe (with a yummy addition) so I decided it was time to get back to my roots!
Both recipes I used were English and I didn't think to go back and measure in cups after I weighed everything. I'll have to do that and come back when I have a bit more time.
These are very quick and easy to make.
Best enjoyed with a cuppa. Translation: hot black tea, preferably with a little milk and, as some Brits like, a bit of sugar.
Proper English Flapjacks
*Note: These are best made with real butter so you get the real sticky toffee taste. However, I do believe they are vegan if you make them with a buttery spread such as Earth Balance.
Yeay! :) (That's the sound of vegan ex-pats rejoicing!)
*Quick edit: I think these may also be gluten-free! Oats are one of those iffy items on GF lists but I know you can find them that are GF.
*Note #2: While I highly recommend getting the proper Lyle's Golden Syrup, you can sub honey or maple syrup if you can't find it. (Lyle's and maple syrup are vegan but honey is not).

Ingredients:
100 grams butter (about 1 stick plus 1 tbsp)
100 grams light brown sugar
1 tbsp. Lyle's Golden Syrup
150 grams rolled oats
Method:
1. Preheat the oven to 325 F. Grease a 7-inch square pan really well (these are extremely sticky so make sure you grease the heck out of that pan!)
2. Place the butter, sugar, and Golden Syrup in a heavy-bottomed saucepan and cook gently over low heat until the butter has melted. Remove from the heat and stir in the oats. Transfer to the prepared baking pan and bake 30-35 minutes until golden brown and bubbly.
3. Let the flapjacks cool for about 10 minutes before cutting them into rectangles or squares. Leave in the tin until they are completely cooled.
Reference:
Based on Flapjack recipe from Wyndham School Home Economics 1st Year Recipe Book (lol... that was my secondary school home ec book from 7th grade! Yes, I'm almost 32 but I still have it! Bit of nostalgia...) and Susan's Southsea Flapjacks from Fresh Mama's (a cookbook put together by a work parent and some of her friends).
Baked Bananas (with Rum!)
The only thing better than cooked fruit: fruit cooked with booze. ;)
Makes a fantastic quick dessert. Great served with ice cream (or you could be good and serve it with fresh berries).
I'm 99% sure this is vegan if you make it with the non-dairy spread.
The photo does not even begin to do this justice...

Serves 2
Ingredients:
1/2 tsp. butter or non-hydrogenated non-dairy spread
1/2 tsp. freshly-squeezed lemon juice
1 tbsp. maple syrup
1/2 tbsp. rum
Pinch of ground cinnamon
2 ripe (but firm) bananas, peeled and sliced in half lengthwise
Method:
1. Preheat the oven to 350 F.
2. Melt the butter and then mix it in with the lemon juice, maple syrup, rum, and cinnamon.
3. Put the bananas in a shallow dish then spoon the buttered rum mixture over them. Bake about 8 minutes or until soft.
4. Remove the bananas from the oven and then preheat the broiler. Broil a couple minutes until the sauce turns into a glaze. Garnish with fresh berries if desired. Serve with ice cream, frozen yoghurt, or non-dairy ice cream.
Reference:
Bananas Baked with Buttered Rum from The Occasional Vegetarian.
The only change I made was to use mango rum in place of the dark rum called for in the recipe. (I was home alone and couldn't reach the good stuff in the back of the liquor cabinet so I grabbed what was available).
The mango rum worked out great but I'll have to try this with some of the yummy Appleton run we brought back from Jamaica...
Makes a fantastic quick dessert. Great served with ice cream (or you could be good and serve it with fresh berries).
I'm 99% sure this is vegan if you make it with the non-dairy spread.
The photo does not even begin to do this justice...

Serves 2
Ingredients:
1/2 tsp. butter or non-hydrogenated non-dairy spread
1/2 tsp. freshly-squeezed lemon juice
1 tbsp. maple syrup
1/2 tbsp. rum
Pinch of ground cinnamon
2 ripe (but firm) bananas, peeled and sliced in half lengthwise
Method:
1. Preheat the oven to 350 F.
2. Melt the butter and then mix it in with the lemon juice, maple syrup, rum, and cinnamon.
3. Put the bananas in a shallow dish then spoon the buttered rum mixture over them. Bake about 8 minutes or until soft.
4. Remove the bananas from the oven and then preheat the broiler. Broil a couple minutes until the sauce turns into a glaze. Garnish with fresh berries if desired. Serve with ice cream, frozen yoghurt, or non-dairy ice cream.
Reference:
Bananas Baked with Buttered Rum from The Occasional Vegetarian.
The only change I made was to use mango rum in place of the dark rum called for in the recipe. (I was home alone and couldn't reach the good stuff in the back of the liquor cabinet so I grabbed what was available).
The mango rum worked out great but I'll have to try this with some of the yummy Appleton run we brought back from Jamaica...
Wednesday, February 4, 2009
Be Grateful for Ice Cream ;)

I am one of the world's biggest Cherry Garcia fans so I've been really wanting to try to make it at home (hubby got me the Ben and Jerry's ice cream recipe book for my birthday last year).
The ice cream is really yummy but I don't think it tastes anything like Cherry Garcia! lol :)
I do have some ideas about that so I'll have to try it again soon. First, I used dried cherries since fresh ones aren't available and when I think of canned cherries, I think of that gooey (not in a good way) cherry pie filling. Yikes! I will try it again with fresh once those are in season. Also, one of my friends suggested using some cherry brandy either in the ice cream base or just poured on top. Will have to try that one, too. :)
This version is more Coldstone than Cherry Garcia. It's a great sweet base with cherries and chocolate chunks mixed in!
Makes 1 Grateful Quart (yes, I ripped that off from the Ben & Jerry's book..)
Ingredients:
2 large eggs
3/4 cup sugar
2 cups heavy cream
1 cup milk
1/4 cup dark chocolate chunks (I just chopped chunks off a bar of chocolate)
1/4 cup cherries, chopped (I used dried but will use fresh next time)
Method:
1. Whisk the eggs and sugar in the bowl of the KA mixer using the wire whisk attachment. Turn the mixer to speed 2 and let it run for about 30 seconds or until the eggs and sugar are slightly thickened.
2. Keep the mixer running at speed 2 while you add in the heavy cream and milk. Let it run until it's all well-mixed.
3. Pour the egg-sugar-milk-cream mixture into a medium saucepan with a heavy bottom. Cook over medium heat until tiny bubbles form around the edge of the mixture and you can see steam rising from the liquid. Do not let it boil! Transfer this mixture into a glass bowl then cover and refrigerate for at least 8 hours.
4. Once the base has thoroughly chilled, attach the frozen ice cream attachment bowl to the KA mixer (make sure it has had at least 15 hours in the freezer). Turn the mixer to speed 1 (STIR). While the dasher is spinning, carefully pour the ice cream base into the ice cream freezer bowl (it's best to use a measuring jug for this part). Let the mixture stir for 15-20 minutes. Add in the chocolate chunks and cherries during the last 2 minutes of stir time.
5. Transfer the ice cream to freezer-safe containers and allow to freeze to desired consistency.
Have a grateful day ;)
References:
Based on the Cherry Garcia recipe from Ben and Jerry's Homemade Ice Cream and Dessert Book by Ben Cohen and Jerry Greenfield with Nancy J. Stevens.
I used the French Vanilla Ice Cream recipe from the little book that came with my KitchenAid ice cream maker attachment but just to figure out the cooking times (I'm really sketchy about raw egg [why do you think I love vegan baking so much?!] and the B&J book didn't cook their base).
Monday, January 19, 2009
Disappearing Brownies
These are quite possibly the best fudge brownies I've ever made. They have this wonderful crispy top that adds an unexpected crunch to this otherwise very fudgy treat!
I do still love the old brownie recipe that I've used for years but something about not having to chop up chocolate (I always thought that was such a PITA) is really refreshing!
Hubby's aunt actually gave me the recipe - she found it in one of those in-flight magazines on her plane trip over Christmas (lol - of all places to find a new favourite recipe!) Unfortunately, I never found out which airline the magazine was from so that's the best I can do for a reference. Given that, I probably shouldn't be blogging these but they were so fantastic, I have to share them! ;)
These got the name since we made a pan and they disappeared within 30 minutes! I don't think the poor things had time to cool completely! :) Needless to say, we made another batch the next day (they are really easy to make). There was a joke going around that if you leave the clean, empty brownie pan out on the counter, more brownies magically appear overnight. Yeah, don't we wish! :)
I haven't tried this yet (believe me, it's on the to-bake list), but I think these would be really easy to convert to a vegan brownie recipe. As far as I can tell, all you'd have to do is to change the butter into 4 cups of non-hydrogenated vegan spread (Earth Balance is my fave) and the eggs to any egg substitute (4 eggs worth). Since they are bars, the egg subs should be pretty easy - you could use ground flax and water, Ener-G egg replacer and water, smushed up silken tofu, applesauce, bananas, or (one I've never tried but am rather intrigued by) vinegar and baking soda.
No photo, sorry! Darn things disappeared too fast! But, hey, that's just another excuse for me to make these again (and to try some of the add-ins I listed below!) :)
Ingredients:
1 cup unsalted butter, melted (2 sticks)
2/3 cup unbleached flour
2 cups granulated sugar
4 large eggs (at room temperature)
1/2 tsp. vanilla extract
3/4 cup unsweetened cocoa powder
1/2 tsp. aluminium-free baking powder
1/2 tsp. salt
Feel free to add in walnuts, pecans, chocolate chips, butterscotch chips, chopped up Heath bars (yum!), toffee bits, dried fruits, etc... (or any combination of those ingredients! I'd say 1/2 cup to 1 cup total would do it)
Ooh, how yummy would these be if you subbed in pure peppermint extract for the vanilla and then crushed up some peppermint candies and added those in? :) I also have to try this base for amaretto brownies.
Method:
Preheat oven to 350 degrees
1. Grease a 9-inch by 9-inch baking pan. I like to rub the butter wrappers on the pan so nothing is wasted. Dust the buttered pan with a little flour.
2. Whisk the sugar and melted butter together in a large bowl. Add in the eggs one at a time and then the vanilla extract.
3. In a separate bowl, blend together the flour, baking powder, cocoa, and salt. Add this mixture to the sugar and butter mixture and stir just until blended (do not overmix).
4. Spread the brownie mixture into the prepared pan. Bake 40 minutes or until a toothpick inserted in the center comes out clean.
Reference:
Oops.. see note above. Thank you airline magazine! And DH's aunt! :) I have a feeling it may have been United... or US Airways (DH might know so I may be back to update this)
The ideas for adding in all the nuts, chips, etc., subbing in the peppermint, and making these vegan were my own. At least nobody can sue me for that part! ;) Thank you to Colleen Patrick-Goudreau and her book The Joy of Vegan Baking for the baking soda and vinegar egg substitute idea.
I do still love the old brownie recipe that I've used for years but something about not having to chop up chocolate (I always thought that was such a PITA) is really refreshing!
Hubby's aunt actually gave me the recipe - she found it in one of those in-flight magazines on her plane trip over Christmas (lol - of all places to find a new favourite recipe!) Unfortunately, I never found out which airline the magazine was from so that's the best I can do for a reference. Given that, I probably shouldn't be blogging these but they were so fantastic, I have to share them! ;)
These got the name since we made a pan and they disappeared within 30 minutes! I don't think the poor things had time to cool completely! :) Needless to say, we made another batch the next day (they are really easy to make). There was a joke going around that if you leave the clean, empty brownie pan out on the counter, more brownies magically appear overnight. Yeah, don't we wish! :)
I haven't tried this yet (believe me, it's on the to-bake list), but I think these would be really easy to convert to a vegan brownie recipe. As far as I can tell, all you'd have to do is to change the butter into 4 cups of non-hydrogenated vegan spread (Earth Balance is my fave) and the eggs to any egg substitute (4 eggs worth). Since they are bars, the egg subs should be pretty easy - you could use ground flax and water, Ener-G egg replacer and water, smushed up silken tofu, applesauce, bananas, or (one I've never tried but am rather intrigued by) vinegar and baking soda.
No photo, sorry! Darn things disappeared too fast! But, hey, that's just another excuse for me to make these again (and to try some of the add-ins I listed below!) :)
Ingredients:
1 cup unsalted butter, melted (2 sticks)
2/3 cup unbleached flour
2 cups granulated sugar
4 large eggs (at room temperature)
1/2 tsp. vanilla extract
3/4 cup unsweetened cocoa powder
1/2 tsp. aluminium-free baking powder
1/2 tsp. salt
Feel free to add in walnuts, pecans, chocolate chips, butterscotch chips, chopped up Heath bars (yum!), toffee bits, dried fruits, etc... (or any combination of those ingredients! I'd say 1/2 cup to 1 cup total would do it)
Ooh, how yummy would these be if you subbed in pure peppermint extract for the vanilla and then crushed up some peppermint candies and added those in? :) I also have to try this base for amaretto brownies.
Method:
Preheat oven to 350 degrees
1. Grease a 9-inch by 9-inch baking pan. I like to rub the butter wrappers on the pan so nothing is wasted. Dust the buttered pan with a little flour.
2. Whisk the sugar and melted butter together in a large bowl. Add in the eggs one at a time and then the vanilla extract.
3. In a separate bowl, blend together the flour, baking powder, cocoa, and salt. Add this mixture to the sugar and butter mixture and stir just until blended (do not overmix).
4. Spread the brownie mixture into the prepared pan. Bake 40 minutes or until a toothpick inserted in the center comes out clean.
Reference:
Oops.. see note above. Thank you airline magazine! And DH's aunt! :) I have a feeling it may have been United... or US Airways (DH might know so I may be back to update this)
The ideas for adding in all the nuts, chips, etc., subbing in the peppermint, and making these vegan were my own. At least nobody can sue me for that part! ;) Thank you to Colleen Patrick-Goudreau and her book The Joy of Vegan Baking for the baking soda and vinegar egg substitute idea.
Thursday, December 18, 2008
Twinkle, Twinkle

Confession: I'm not much of a sugar cookie fan. They're just a bit boring generally. I do love this recipe that I found on Annie's blog last year - the almond extract really adds that necessary little je ne c'est quoi :)
These are another great option for people who are bored with basic sugar cookies. The cardamom adds a lovely almost flowery taste. It's also quickly becoming one of my new favourite kitchen scents. I kept wafting the bottle under my nose as I was making the dough for these.
I found these to be rather reminiscent of lavender shortbread. Yum!
Cardamom Sugar Stars
Yield: About 3 dozen cookies
Ingredients:
Cookies ~
1 7/8 cup unbleached all-purpose flour (yes, I halved the original recipe and ended up with a wonky amount. Could have been worse...)
1/2 tsp. baking powder
1/4 tsp. salt
1 cup granulated sugar
1/2 cup unsalted butter, softened (room temp)
1/2 tsp. ground cardamom
1 egg
1/2 tbsp. vanilla extract (no, that's not a typo! It should be 1/2 tablespoon)
Spice Mixture ~
1/8 cup sugar or sparkling sugar (see note below)
1/8 tsp. ground cardamom
Method:
*Note: You will need to refrigerate the dough overnight so keep that in mind before starting these.
1. Whisk together the flour, baking powder, and salt in a medium-sized mixing bowl.
2. Cream the butter, 1 cup sugar, and 1/2 tsp. cardamom in a large bowl. Beat in the egg and vanilla then mix in the flour mixture until it is just blended. Knead the dough by hand just until it is smooth. Divide the dough into two pieces; shape into flat rounds. Cover the rounds and refrigerate until firm enough to roll (overnight or up to two days).
3. Preheat oven to 350 degrees. Line baking sheets with parchment paper. Remove the dough from the refrigerator (one round at a time) and let it stand at room temperature until it is soft enough to roll but still firm. Roll the dough between two pieces of parchment paper to about 1/8-inch thickness. If the dough gets too soft at any time, you can return it to the fridge until it's firm.
4. Use a star-shaped cookie cutter to cut out the dough (it's helpful to dip the cutter in flour to help prevent sticking). Reroll leftover scraps. Repeat with remaining dough.
5. Combine all the spice mixture ingredients in a small bowl and sprinkle over the cookies. Bake 8-10 minutes or until pale golden brown at the edges. Let cool on wire racks.
These cookies can be made ahead. According to the original recipe, you can make them a month ahead and store them in airtight containers. I like to freeze my baked cookies.
Sparkling sugar:
I actually found sparkling sugar at Michaels (Wilton brand).
You can also order it from the following places:
King Arthur Flour
Fancy Flours
Great News
If you can't find it, you could sub regular granulated sugar or turbinado.
Reference:
Cardamom Sugar Stars by Alice Medrich. I found this recipe in the December 2007/January 2008 issue of Cooking Pleasures Magazine.
I didn't change anything this time around but I'm interested in trying different extracts (orange or almond? I think either of those would work with the sweet cardamom) or maybe subbing in cinnamon for the cardamom.
Tuesday, July 1, 2008
Fresh Berries with Almond Cream
Yum... what a wonderful low-fat dessert! You will not believe how creamy the sauce is even though I used fat-free milk. :)
Plan at least 5 hours ahead for this!
2 servings
Ingredients:
1/4 cup blanched almonds
1 cup fat-free milk
1/8 cup sugar
3/4 tbsp. cornstarch
1 tbsp. amaretto
1/8 cup fresh organic raspberries
1/8 cup fresh organic blueberries
1/4 cup fresh organic strawberries
Method:
1. Preheat the oven to 325 degrees. Roast the almonds on a baking sheet for 15 minutes until they become light brown. Allow them to cool and then pulse them in a food processor or coffee grinder until they are finely ground.
2. In a medium saucepan, combine the ground almonds, 3/4 cup milk, and sugar. Stirring every minute or two, bring this mixture to a simmer over medium-low heat. Remove from the heat, cover, and let the almonds steep for 1 hour.
3. Strain the mixture over a glass bowl through a fine-mesh sieve, pressing down on the almonds to extract all the liquid. Discard the solids left in the sieve.
4. Bring the almond-milk mixture to a simmer. Reduce the heat to low. Dissolve the cornstarch in the remaining 1/4 cup milk. Gradually stir the cornstarch-milk mixture into the simmering liquid. Simmer, stirring constantly, until the custard thickens. Add 1/2 tbsp. amaretto and stir.
5. Strain the custard through a fine-mesh sieve into a glass bowl. Place a sheet of plastic wrap directly on top of the custard to keep a skin from forming. Chill at least 4 hours or overnight.
**The custard can be made up to 3 days ahead and refrigerated.**
6. Marinate the berries in the remaining amaretto for at least 2 hours. Just before serving, beat the custard with a wire whisk. Pour the custard over the berries.
Reference:
From The Occasional Vegetarian (Original recipe title was "Mixed Berries with Almond Cream). The only change I made was to use strawberries in place of blackberries. You can make this with whatever berries you have on hand.
Plan at least 5 hours ahead for this!
2 servings
Ingredients:
1/4 cup blanched almonds
1 cup fat-free milk
1/8 cup sugar
3/4 tbsp. cornstarch
1 tbsp. amaretto
1/8 cup fresh organic raspberries
1/8 cup fresh organic blueberries
1/4 cup fresh organic strawberries
Method:
1. Preheat the oven to 325 degrees. Roast the almonds on a baking sheet for 15 minutes until they become light brown. Allow them to cool and then pulse them in a food processor or coffee grinder until they are finely ground.
2. In a medium saucepan, combine the ground almonds, 3/4 cup milk, and sugar. Stirring every minute or two, bring this mixture to a simmer over medium-low heat. Remove from the heat, cover, and let the almonds steep for 1 hour.
3. Strain the mixture over a glass bowl through a fine-mesh sieve, pressing down on the almonds to extract all the liquid. Discard the solids left in the sieve.
4. Bring the almond-milk mixture to a simmer. Reduce the heat to low. Dissolve the cornstarch in the remaining 1/4 cup milk. Gradually stir the cornstarch-milk mixture into the simmering liquid. Simmer, stirring constantly, until the custard thickens. Add 1/2 tbsp. amaretto and stir.
5. Strain the custard through a fine-mesh sieve into a glass bowl. Place a sheet of plastic wrap directly on top of the custard to keep a skin from forming. Chill at least 4 hours or overnight.
**The custard can be made up to 3 days ahead and refrigerated.**
6. Marinate the berries in the remaining amaretto for at least 2 hours. Just before serving, beat the custard with a wire whisk. Pour the custard over the berries.
Reference:
From The Occasional Vegetarian (Original recipe title was "Mixed Berries with Almond Cream). The only change I made was to use strawberries in place of blackberries. You can make this with whatever berries you have on hand.
Saturday, May 10, 2008
Strawberry Chocolate Chip Bread
 I managed to find a really good deal on some local strawberries last week but, since I'm the only one in the house who will eat them (!), I needed a quick way to use them up. Strawberry bread it was! :) This was a recipe posted by one of the girls on the Nest - she doesn't have a blog so I'm *publishing* it for her.
My changes:
*The original recipe would have made 2 loaves (9x5x3-inch). I halved it so that's what is reflected here.
*I omitted 1/4 cup chopped nuts (didn't have any on-hand) and used 1/2 chocolate chips instead.
*Rather than halve the amount of vanilla extract, I just left it at 1/2 tsp.
*I also kept the full amount of strawberries instead of halving that.
I'd love to try this with a mix of strawberries and raspberries next time!
Ingredients:
1/4 cup unsalted butter (1/2 stick)
1/2 cup sugar
2 large eggs
1/2 tsp. vanilla extract
1 3/4 cups unbleached all-purpose flour
2 tsp. aluminium-free baking powder
1/2 tsp. salt
1/2 cup milk (I used fat-free)
1 cup chopped fresh strawberries
1/2 cup semi-sweet chocolate chips
Method:
Preheat the oven to 350 degrees.
1. Lightly grease a 9x5x3-inch loaf pan. Set aside.
2. In a large bowl, cream the butter and sugar. Mix in the eggs and vanilla.
3. In another bowl, stir together the flour, baking powder, and salt. Add the dry ingredients to the egg mixture alternatively with the milk, beating until combined after each addition. Use a wooden spoon to stir in the strawberries and chocolate chips. Pour into the prepared pan.
4. Bake for 50-55 minutes or until a toothpick inserted in the center comes out clean.
5. Cool on wire racks for 10 minutes. Remove from the pan and cool completely.

Reference:
Thank-you, msT2B on the Nest! This is based on her recipe for Strawberry Bread.

Friday, April 11, 2008
Vegan Chocolate Cupcakes 2
I've made vegan chocolate cupcakes before but this recipe is quite different! The first ones were super yummy but they had quite a bit of molasses in them and tasted a lot like chocolate gingerbread! Not a problem for me but other people may be a bit weirded out by that! These are a lot more traditional and are some of the most moist cupcakes I have ever had! You would never know these were vegan if you just grabbed one and tried it! :)
It's our nephew's first birthday tomorrow and I was asked to make a batch of vegan cupcakes for the party. Originally, I had planned to make 1 batch of the molasses ones and 1 batch of these but I decided after some thought just to go with these.
This is also my first time using agave nectar as a sweetener - I'm sold! This stuff is totally natural, 100% plant-based, and has a lower glycemic index than regular sugar. It also makes a wonderful vegan substitute for honey. You can mix in into any baking recipe in place of granulated sugar (the ratio is 3/4 cup agave nectar to 1 cup sugar) or stir it into tea in place of honey.
I didn't make the frosting but I'll include the recipe just in case you would like to try it - I've had it before and it is very tasty! Good excuse to satisfy your curiosity and buy a carton of soy milk. :)
PS (and then I swear I will get to the recipe!): The uncooked batter is soooo tasty! :) Best part about vegan baking, really, you get to lick the spoon! And the whisk, and any that drips on the counter, and the spatula... ;)
Here's the recipe - I got this from the mother of one of my students. My changes are in green.

Makes 24 cupcakes
Ingredients:
2 cups water
1 1/2 cups agave nectar (or 2 cups sugar)
1/2 cup vegetable oil
2 tbsp. white or cider vinegar or freshly squeezed lemon juice
1/2 cup applesauce (I made some and used that - see tip below!)
1 tbsp. pure vanilla extract
3 cups unbleached all-purpose flour
2/3 cup unsweetened cocoa powder (yeay for chocolate being a superfood! in moderation, of course!)
2 tsp. baking soda
1 tsp. salt
For the frosting:
3 cups powdered sugar (you can get some that is "vegan")
2/3 cup unsweetened cocoa
1/2 cup vegan buttery spread (Earth Balance works well) or vegetable oil
1/3 cup vanilla soy or rice milk
1 tsp. pure vanilla extract
Optional fresh raspberries, strawberries, or edible flowers as a garnish
Method:
1. Preheat the oven to 350 degrees. Line 2 cupcake pans with cupcake papers.
2. Sift the flour and cocoa into a large bowl. Add the baking soda and salt and stir until combined. If you're using dry sugar, mix it in with these ingredients.
3. In a separate bowl, combine the agave nectar (if using it), water, oil, lemon juice, applesauce, and vanilla. Stir well. Pour the water mixture into the dry mixture, whisking vigourously until the mixture is smooth and free of lumps.
4. Spoon the batter into the cupcake liners (mine was really runny! This is OK). Bake at 350 degrees for 15-20 minutes (mine only needed 15) or until a toothpick inserted into the center comes out clean.
5. To prepare the frosting, blend powdered sugar and cocoa. Melt the buttery spread and then add it, along with the soy milk and vanilla, to the sugar and cocoa mixture. Beat until smooth. Frost cooled cupcakes and garnish if desired.
**Note: You can also make this into a layer cake. Use the same amounts as above but place the completed batter into 2 9-inch round cake pans or 1 9x13-inch pan coated with cooking spray. Bake these cakes for 25-30 minutes at 350 (or until a toothpick comes out clean).
**Applesauce note: So I made this really yummy applesauce yesterday to put into these cupcakes. I kept telling myself "OK, you'll need to give this a quick spin in the food processor so it's not lumpy." Yeah, guess what blondie here forgot to do?! :) Took me a minute to figure out why my batter was lumpy, too! I thought something weird had happened and the agave had reacted with the cocoa or something. :) No, I just had a blonde moment. I was a bit worried the cakes would have weird chunks of apple in them but you can hardly tell.. in the future, or if you try this, make sure and puree the applesauce before adding it to the batter.
Additionally, the applesauce is actually totally optional but it really does add to the moistness of these cakes so it is worth it to throw it in if you have some. It's also super-quick to make! :)
Reference:
I found this in the Fresh Mama's cookbook. The recipe in that book was inspired by one from The Passionate Vegetarian.
It's our nephew's first birthday tomorrow and I was asked to make a batch of vegan cupcakes for the party. Originally, I had planned to make 1 batch of the molasses ones and 1 batch of these but I decided after some thought just to go with these.
This is also my first time using agave nectar as a sweetener - I'm sold! This stuff is totally natural, 100% plant-based, and has a lower glycemic index than regular sugar. It also makes a wonderful vegan substitute for honey. You can mix in into any baking recipe in place of granulated sugar (the ratio is 3/4 cup agave nectar to 1 cup sugar) or stir it into tea in place of honey.
I didn't make the frosting but I'll include the recipe just in case you would like to try it - I've had it before and it is very tasty! Good excuse to satisfy your curiosity and buy a carton of soy milk. :)
PS (and then I swear I will get to the recipe!): The uncooked batter is soooo tasty! :) Best part about vegan baking, really, you get to lick the spoon! And the whisk, and any that drips on the counter, and the spatula... ;)
Here's the recipe - I got this from the mother of one of my students. My changes are in green.

Makes 24 cupcakes
Ingredients:
2 cups water
1 1/2 cups agave nectar (or 2 cups sugar)
1/2 cup vegetable oil
2 tbsp. white or cider vinegar or freshly squeezed lemon juice
1/2 cup applesauce (I made some and used that - see tip below!)
1 tbsp. pure vanilla extract
3 cups unbleached all-purpose flour
2/3 cup unsweetened cocoa powder (yeay for chocolate being a superfood! in moderation, of course!)
2 tsp. baking soda
1 tsp. salt
For the frosting:
3 cups powdered sugar (you can get some that is "vegan")
2/3 cup unsweetened cocoa
1/2 cup vegan buttery spread (Earth Balance works well) or vegetable oil
1/3 cup vanilla soy or rice milk
1 tsp. pure vanilla extract
Optional fresh raspberries, strawberries, or edible flowers as a garnish
Method:
1. Preheat the oven to 350 degrees. Line 2 cupcake pans with cupcake papers.
2. Sift the flour and cocoa into a large bowl. Add the baking soda and salt and stir until combined. If you're using dry sugar, mix it in with these ingredients.
3. In a separate bowl, combine the agave nectar (if using it), water, oil, lemon juice, applesauce, and vanilla. Stir well. Pour the water mixture into the dry mixture, whisking vigourously until the mixture is smooth and free of lumps.
4. Spoon the batter into the cupcake liners (mine was really runny! This is OK). Bake at 350 degrees for 15-20 minutes (mine only needed 15) or until a toothpick inserted into the center comes out clean.
5. To prepare the frosting, blend powdered sugar and cocoa. Melt the buttery spread and then add it, along with the soy milk and vanilla, to the sugar and cocoa mixture. Beat until smooth. Frost cooled cupcakes and garnish if desired.
**Note: You can also make this into a layer cake. Use the same amounts as above but place the completed batter into 2 9-inch round cake pans or 1 9x13-inch pan coated with cooking spray. Bake these cakes for 25-30 minutes at 350 (or until a toothpick comes out clean).
**Applesauce note: So I made this really yummy applesauce yesterday to put into these cupcakes. I kept telling myself "OK, you'll need to give this a quick spin in the food processor so it's not lumpy." Yeah, guess what blondie here forgot to do?! :) Took me a minute to figure out why my batter was lumpy, too! I thought something weird had happened and the agave had reacted with the cocoa or something. :) No, I just had a blonde moment. I was a bit worried the cakes would have weird chunks of apple in them but you can hardly tell.. in the future, or if you try this, make sure and puree the applesauce before adding it to the batter.
Additionally, the applesauce is actually totally optional but it really does add to the moistness of these cakes so it is worth it to throw it in if you have some. It's also super-quick to make! :)
Reference:
I found this in the Fresh Mama's cookbook. The recipe in that book was inspired by one from The Passionate Vegetarian.
Thursday, April 10, 2008
Applesauce
I made this since I wanted a natural (high fructose corn syrup-free) applesauce to mix in to some vegan chocolate cupcakes I'm making for my nephew's first birthday this weekend! :) Our little man is one... hard to believe! This was a collaboration of some recipes and suggestions from some of the ladies on the Nest.
This made about 4 cups (it also makes a yummy dessert!)
Ingredients:
4 apples - any kind you like - peeled, cored, and diced
3/4 cup water
1/2 tsp. ground cinnamon
1/8 tsp. ground allspice
Method:
1. Combine apples, water, cinnamon, and allspice in a Dutch oven or heavy saucepan. Cover and cook over medium heat for 20-25 minutes (until apples are soft and the liquid has been absorbed).
2. Allow the apples to cool and then smush them with a fork or potato masher. You could also transfer them to a food processor or blender to get a really smooth consistency.
References:
Thank you to Beebe929, ses1199, and CJNeeley from the Nest. :) I also used this applesauce recipe from a Nestie blog (oops - didn't write down your Nest name...). I left out the sugar based on suggestions from other Nesties and my desire to not use refined sugar in this (it will be eaten by vegans, after all!) :)
This made about 4 cups (it also makes a yummy dessert!)
Ingredients:
4 apples - any kind you like - peeled, cored, and diced
3/4 cup water
1/2 tsp. ground cinnamon
1/8 tsp. ground allspice
Method:
1. Combine apples, water, cinnamon, and allspice in a Dutch oven or heavy saucepan. Cover and cook over medium heat for 20-25 minutes (until apples are soft and the liquid has been absorbed).
2. Allow the apples to cool and then smush them with a fork or potato masher. You could also transfer them to a food processor or blender to get a really smooth consistency.
References:
Thank you to Beebe929, ses1199, and CJNeeley from the Nest. :) I also used this applesauce recipe from a Nestie blog (oops - didn't write down your Nest name...). I left out the sugar based on suggestions from other Nesties and my desire to not use refined sugar in this (it will be eaten by vegans, after all!) :)
Monday, March 3, 2008
Guilt-Free Rice Pudding
 **Update - it is even better a day later! :) I threw the leftovers in the fridge yesterday and just heated some up for a little pre-lunch goody! Yum :)**
Mmmm... I have been craving rice pudding for goodness knows how long! I can't remember the last time I had it but I know it's been way too long! It was sort of a staple dessert for my family growing up. We really only ate dessert after Sunday lunch but we often had rice pudding... it's like ambrosia to me!
I found this recipe in Cooking Light and tagged it to try but since my husband won't eat it, I've been reluctant to try it. I finally decided "oh well, too bad for him" and made it anyway! So creamy and delicious - he obviously doesn't know what he's missing ;)
It's really low-fat and I skipped the salt that was called for in the recipe... the egg does add quite a bit of cholesterol but it's really not much since it's only 1/4 egg per serving. Besides, it's protein! :) You could use 2 egg whites in place of the whole egg to make it even less of a guilty dessert.
Serves 4
Ingredients:
1 cup cooked short-grain rice (I used 1/2 cup dry rice and 1 cup water to get this)
1 3/4 cup fat-free milk
1/6 cup sugar
1/8 cup nonfat dry milk
1 large egg, beaten
1/2 tsp. vanilla extract
1/4 tsp. ground cinnamon
1/4 tsp. ground nutmeg
Method:
1. Combine the rice, liquid and dry milks, and sugar in a large saucepan over medium heat; bring to a simmer. Simmer for 30 minutes; stirring occasionally.
2. Place the egg in a medium bowl. Gradually add half of the rice mixture, stirring constantly with a whisk while adding. Return the egg mixture to the pan/remaining rice over medium-low heat. Cook for 2-3 minutes, stirring constantly. Remove from the heat, stir in the vanilla, cinnamon, and nutmeg.
Reference:
Based on the Rice Pudding recipe from the October 2007 issue of Cooking Light magazine.
Changes: I actually used medium-grain rice since I couldn't find short-grain that wasn't obnoxiously expensive! I left out the raisins (I'm actually eating those on the side!) and I added some nutmeg in place of half the cinnamon. My mom makes rice pudding and uses nutmeg so we can thank her for that :)
She also bakes it - I am definitely going to have to remember to ask for the recipe!
Friday, February 15, 2008
Cloud Lime
**I do have plans to take a photo of this! I got a bit impatient and didn't let it chill long enough before tasting it so there was no way I was going to take a photo of not-fully-set pie! ;) I'll try again today...
It's super yummy! (even if it wasn't quite ready!)
My original plan was to make this for Valentine's Day dessert... but then I read the recipe Thursday morning and realized it needed to refrigerate overnight! lol :)
The original recipe was called "Key Lime Cloud Pie," I just changed the name to make a play on that and cloud nine.
Warning - this has like 50g of fat per serving (eek!) so it will only be a once-in-a-while treat..! ;)
8 servings
Ingredients
Crust
1 1/4 cups graham cracker crumbs (I got the low-fat ones... like that will make a difference with all the eggs, butter, and cream!)
3 tbsp. sugar
6 tbsp. unsalted butter, melted
Filling
4 egg yolks
3 eggs
1/2 cup unsalted butter, cut up
1/2 cup plus 2 tsp. sugar, divided
1/3 cup key lime juice (you will need a lot of key limes!)
1 tbsp. plus 1 tsp. grated lime peel, divided
2 1/4 cups heavy whipping cream, divided
Method:
1. Combine graham cracker crumbs and 3 tbsp. sugar in a small bowl. With a fork, stir in the melted butter until the crumbs are moistened. Press into the bottom and up the sides of a 9-inch pie pan. Refrigerate.
2. Whisk the eggs and egg yolks in a medium bowl. Set aside.
3. Combine 1/2 cup butter, 1/2 cup of the sugar, the lime juice, and 1 tbsp. of the lime peel in a large bowl. Create a double-boiler by placing the bowl over a saucepan of simmering water; stir the mixture until the butter melts and sugar dissolves.
4. Gradually whisk 1/3 cup of the juice mixture into the egg mixture. Whisk the whole thing back into the juice mixture. Cook over saucepan of simmering water until the mixture thickens and the temperature reaches 165 degrees-170 degrees F. **The original recipe said 4-5 minutes! Ha! I stood there for ages waiting for it to reach temp. but you can't be impatient since it's raw eggs...*
5. Pour the lime mixture through a strainer into a large bowl. Cover and refrigerate at least two hours or until chilled.
6. Beat 1 1/2 cups of the cream in a large bowl at medium-high speed until stiff but not dry peaks form. Gently fold into the cooled lime mixture. Spoon into the pie crust and smooth the top. Cover and refrigerate overnight.
7. Up to 3 hours before serving, beat the remaining 3/4 cup cream with remaining 2 tsp. sugar in a medium bowl at medium-high speed. Pile whipped cream over the top of the pie. Sprinkle with remaining 1 tsp. peel.
Store the pie in the refrigerator.
Reference:
The original recipe (I didn't make any changes) came from Cooking Pleasures Magazine (February/March 2008).
It's super yummy! (even if it wasn't quite ready!)
My original plan was to make this for Valentine's Day dessert... but then I read the recipe Thursday morning and realized it needed to refrigerate overnight! lol :)
The original recipe was called "Key Lime Cloud Pie," I just changed the name to make a play on that and cloud nine.
Warning - this has like 50g of fat per serving (eek!) so it will only be a once-in-a-while treat..! ;)
8 servings
Ingredients
Crust
1 1/4 cups graham cracker crumbs (I got the low-fat ones... like that will make a difference with all the eggs, butter, and cream!)
3 tbsp. sugar
6 tbsp. unsalted butter, melted
Filling
4 egg yolks
3 eggs
1/2 cup unsalted butter, cut up
1/2 cup plus 2 tsp. sugar, divided
1/3 cup key lime juice (you will need a lot of key limes!)
1 tbsp. plus 1 tsp. grated lime peel, divided
2 1/4 cups heavy whipping cream, divided
Method:
1. Combine graham cracker crumbs and 3 tbsp. sugar in a small bowl. With a fork, stir in the melted butter until the crumbs are moistened. Press into the bottom and up the sides of a 9-inch pie pan. Refrigerate.
2. Whisk the eggs and egg yolks in a medium bowl. Set aside.
3. Combine 1/2 cup butter, 1/2 cup of the sugar, the lime juice, and 1 tbsp. of the lime peel in a large bowl. Create a double-boiler by placing the bowl over a saucepan of simmering water; stir the mixture until the butter melts and sugar dissolves.
4. Gradually whisk 1/3 cup of the juice mixture into the egg mixture. Whisk the whole thing back into the juice mixture. Cook over saucepan of simmering water until the mixture thickens and the temperature reaches 165 degrees-170 degrees F. **The original recipe said 4-5 minutes! Ha! I stood there for ages waiting for it to reach temp. but you can't be impatient since it's raw eggs...*
5. Pour the lime mixture through a strainer into a large bowl. Cover and refrigerate at least two hours or until chilled.
6. Beat 1 1/2 cups of the cream in a large bowl at medium-high speed until stiff but not dry peaks form. Gently fold into the cooled lime mixture. Spoon into the pie crust and smooth the top. Cover and refrigerate overnight.
7. Up to 3 hours before serving, beat the remaining 3/4 cup cream with remaining 2 tsp. sugar in a medium bowl at medium-high speed. Pile whipped cream over the top of the pie. Sprinkle with remaining 1 tsp. peel.
Store the pie in the refrigerator.
Reference:
The original recipe (I didn't make any changes) came from Cooking Pleasures Magazine (February/March 2008).
Wednesday, February 6, 2008
Better-Than-Sex Cake

Well, I'm not sure I'd say it was that good! ;) This was another thing I decided to try out for the Superbowl party. Again, I got this from a post someone left on the Nest but I can't remember her name (same person who posted the crack dip last week - they were in the same post!) Oh well... I was never accused of being perfect ;)
Here's how I made it (it is slightly different to the original version)
Ingredients:
1 chocolate cake (recipe below)
3/4 cup caramel topping (I used jarred caramel ice-cream topping. I'll try just melting some caramels and using those next time)
3/4 cup sweetened condensed milk (I'm really not sure why I needed this. I'm going to skip it next time)
1 Symphony bar - the one with toffee bits and almonds
1 cup heavy whipping cream
Method:
1. Bake chocolate cake according to recipe below.
2. Leave the cake in the baking pan. While it is still warm, poke small holes in the cake using a toothpick. Drizzle the caramel sauce over the cake.
3. Let the cake stand to cool. Whip up the heavy whipping cream and then coat the top of the cake with the whipped cream. Sprinkle with chopped up pieces of the chocolate bar.
4. Refrigerate until you are ready to serve the cake. It's great with a scoop of vanilla ice-cream :)
Here's the chocolate cake recipe I used. It's the cake base from "Chocolate Cake with Peanut Butter Frosting" from the Land O'Lakes Baking book.
Ingredients:
1 2/3 cups sugar
3/4 cup unsalted butter, softened
3 eggs
1 tsp. vanilla
2 cups all-purpose flour
2/3 cup unsweetened cocoa
1 1/4 tsp. baking soda
1/2 tsp. baking powder
1/2 tsp. salt
1 1/3 cups milk
Method:
Preheat oven to 350 degrees
1. Grease and lightly flour a 13x9x2-inch baking dish (a lasagna dish works perfectly!)
2. Combine the sugar and butter in the bowl of a stand mixer or other large bowl. Beat until creamy. Add the eggs and vanilla; continue beating until well-mixed. Add flour, cocoa, baking powder, baking soda, and salt to butter mixture alternatively with the milk (I put all the dry ingredients in a separate bowl then added the dry and the milk a little at a time). Beat just until blended.
3. Pour the batter into the prepared pan. Bake 30-40 minutes until a toothpick inserted in the center comes out clean.
Thursday, December 20, 2007
Gingerbread Cookies w/ Fresh Ginger

And here's the other gingerbread recipe. I really think the fresh ginger adds something to them! If you don't have fresh ginger, you can always substitute an additional 1/2 tsp. ground ginger for the 2 tsp. of fresh ginger called for in this recipe.
**Photos coming later on after I have a chance to decorate them!**
I usually get anywhere from 30-45 cookies from this recipe; depending on which cutters I use (I have a small village worth of gingerbread men cutters!)
Ingredients:
2 1/4 cups all-purpose flour
1/4 tsp. salt
3/4 tsp. baking soda
2 tsp. ground ginger
1 1/2 tsp. cinnamon
1/2 tsp. ground allspice
2/3 cup packed brown sugar (I always use light brown sugar; since these also use molasses I don't suppose it matters if you use dark or light sugar)
2/3 cup granulated sugar
1/2 cup unsalted butter, melted, warm
1/4 cup molasses
2 tsp. grated fresh ginger
1 egg
Method:
1. In a medium bowl, combine the flour, salt, baking soda, ground ginger, cinnamon, and allspice. In a large bowl (I used my KA mixer), stir together the brown sugar, butter, molasses, fresh ginger, and egg until well-blended. Slowly stir in the flour mixture until just combined. Form dough into 2 flat rounds. Cover and refrigerate overnight or up to 3 days.
2. Line baking sheets with parchment paper and preheat the oven to 350 degrees F.
3. Lightly sprinkle rolling surface with flour. Roll one dough round to 1/8- to 1/4-inch thickness. Use cookie cutters to cut dough into desired shapes. Remove and reserve dough scraps from around each cookie - you can re-use them! Place cookies at least 1 inch apart on the prepared cookie sheets. Bake 7-9 minutes or until cookies just begin to colour at the edges. Cool completely on a wire rack. Repeat with remaining dough and dough scraps. Cookies can be decorated with frosting, nuts, candies, etc. once they are cooled.

Great Gingerbread Icing Ideas:
*1 cup powdered sugar mixed with 1-2 tbsp. water.
*1 cup powdered sugar combined with 1-2 tbsp. water plus 1/4 tsp. finely grated fresh ginger.
*2 cups powdered sugar, 1 tsp. vanilla extract, 2 tbsp. milk.
*One I haven't tried but it sounds great - mix some melted white chocolate with a little lemon extract. I made a chocolate topping for Grand Marnier cupcakes which used 3 oz. semi-sweet chocolate, coarsely chopped and 1/2 tsp. vegetable shortening. For gingerbread, I'd use 3 oz. white chocolate chopped, 1/2 tsp. veg. shortening, and 1/4-1/2 tsp. lemon extract. Melt the chocolate and shortening in a double-boiler. Place the melted chocolate mix in a large Zip-Lock bag and mix in the extract by squishing the bag. Snip a corner off the bag and use this to decorate the cookies. **You may need to play around with the extract amount - I've never tried this so I honestly wouldn't know how much to use! That amount is just a guess :)
Reference:
This recipe came from the December 2001/January 2002 issue of Cooking Pleasures Magazine. The name of the original recipe was "Golden Gingerbread People." This is also where I got the idea to add fresh ginger to the basic frosting. When I tried that the first time I thought I'd died and gone to heaven! :)
Tips for Rolled Cookies
I know how much of a pest rolled cookies can be so here's a couple tips to help make your life a little easier :)
*Chill the dough for an adequate amount of time. For these sugar cookies, I let mine chill for at least 4 hours. Patience is definitely a virtue when making rolled cookies!
*Keep dough that you are not rolling/cutting in the fridge.
*Flour your work surface, rolling pin, and cutters. You can always gently dust off extra flour using a pastry brush - especially important with darker cookies like gingerbread.
*Work with small pieces of dough at a time.
*Try rolling the dough between two sheets of either wax or parchment paper. You will still need a little flour on the paper but it will prevent the dough from sticking to your counter-tops, rolling pin, or cutting board.
*Remember, they are so worth it when they're all done and decorated! :)
Gingerbread Cookies (w/ Ground Ginger)
I actually have 2 gingerbread cookie recipes that I like - this is the one which does not require fresh ginger.
**Photos coming later after I decorate them!**
This will make a LOT of dough - enough for 30 or so large cookies. You can easily halve the recipe if needed.
Ingredients:
5 cups all-purpose flour
4 tsp. ground ginger
1 tbsp. ground cinnamon
1 tsp. freshly grated nutmeg or 1/2 tsp. ground nutmeg
1/2 tsp. ground cloves
1 tsp. salt
1/2 tsp. baking soda
16 tbsp. (2 sticks) unsalted butter, softened
2/3 cup firmly packed dark brown sugar
2 large eggs
2/3 cup molasses
Method:
1. Combine the flour, spices, salt, and baking soda in a large bowl; stir well to mix.
2. In the bowl of a stand mixer fitted with the paddle attachment, beat together the butter and brown sugar on medium speed until well mixed (about 1 minute). Beat in the eggs, one at a time, beating smooth after each addition. Scrape down the bowl and beater.
**There is no law saying you have to use a stand mixer for this! If you don't have one you can always make these by hand. Goodness knows people have been making cookies since long before KA mixers were invented (I do have to say, mine makes my life so much easier, though!!**
3. Lower the mixer speed and beat in about half the flour mixture. Beat in all the molasses, then scrape the bowl and beater. Add the remaining flour mixture, about a cup at a time, and beat after each addition until it has all been absorbed.
4. Remove the bowl from the mixer and give the dough a final mixing with a large rubber spatula. Scrape half the dough onto a large piece of plastic wrap and press it to about a 1/2-inch thickness. Wrap the dough securely and repeat with the remaining dough. Chill the dough for at least 2 hours or up to 3 days (I always let mine chill overnight).
5. When you are ready to bake the cookies, prepare the cookie sheets by lining them with parchment paper and pre-heat the oven to 350 degrees F.
6. Unwrap one of the pieces of dough and cut it in half. Re-wrap the dough you are not using and return it to the fridge!
7. On a floured surface, roll out the dough to about 1/4-inch thick. Use a floured cookie cutter to cut the cookies. As they are cut, place them on the prepared pans about an inch apart in all directions. Repeat with the remaining dough. Save, press together, and re-roll the dough scraps.
8. Bake the cookies for 12-15 minutes (I only give mine 7-9 since my oven is a bit funny), or until they become dull and dry-looking and feel slightly firm when pressed with a fingertip. Slide the papers onto racks to cool. After the cookies have cooled they can be decorated with icing, candies, nuts, whatever you like.
9. Store cooled cookies between sheets of parchment or wax paper in a tin or plastic container with a tight-fitting lid.
Great Gingerbread Icing Ideas:
*1 cup powdered sugar mixed with 1-2 tbsp. water.
*1 cup powdered sugar combined with 1-2 tbsp. water plus 1/4 tsp. finely grated fresh ginger.
*2 cups powdered sugar, 1 tsp. vanilla extract, 2 tbsp. milk.
*One I haven't tried but it sounds great - mix some melted white chocolate with a little lemon extract. I made a chocolate topping for Grand Marnier cupcakes which used 3 oz. semi-sweet chocolate, coarsely chopped and 1/2 tsp. vegetable shortening. For gingerbread, I'd use 3 oz. white chocolate chopped, 1/2 tsp. veg. shortening, and 1/4-1/2 tsp. lemon extract. Melt the chocolate and shortening in a double-boiler. Place the melted chocolate mix in a large Zip-Lock bag and mix in the extract by squishing the bag. Snip a corner off the bag and use this to decorate the cookies. **You may need to play around with the extract amount - I've never tried this so I honestly wouldn't know how much to use! That amount is just a guess :)
Reference:
This is the "Gingerbread People" recipe from Nick Malgieri's "Cookies Unlimited."
Tips for Rolled Cookies
I know how much of a pest rolled cookies can be so here's a couple tips to help make your life a little easier :)
*Chill the dough for an adequate amount of time. For these sugar cookies, I let mine chill for at least 4 hours. Patience is definitely a virtue when making rolled cookies!
*Keep dough that you are not rolling/cutting in the fridge.
*Flour your work surface, rolling pin, and cutters. You can always gently dust off extra flour using a pastry brush.
*Work with small pieces of dough at a time.
*Try rolling the dough between two sheets of either wax or parchment paper. You will still need a little flour on the paper but it will prevent the dough from sticking to your counter-tops, rolling pin, or cutting board.
*Remember, they are so worth it when they're all done and decorated! :)
**Photos coming later after I decorate them!**
This will make a LOT of dough - enough for 30 or so large cookies. You can easily halve the recipe if needed.
Ingredients:
5 cups all-purpose flour
4 tsp. ground ginger
1 tbsp. ground cinnamon
1 tsp. freshly grated nutmeg or 1/2 tsp. ground nutmeg
1/2 tsp. ground cloves
1 tsp. salt
1/2 tsp. baking soda
16 tbsp. (2 sticks) unsalted butter, softened
2/3 cup firmly packed dark brown sugar
2 large eggs
2/3 cup molasses
Method:
1. Combine the flour, spices, salt, and baking soda in a large bowl; stir well to mix.
2. In the bowl of a stand mixer fitted with the paddle attachment, beat together the butter and brown sugar on medium speed until well mixed (about 1 minute). Beat in the eggs, one at a time, beating smooth after each addition. Scrape down the bowl and beater.
**There is no law saying you have to use a stand mixer for this! If you don't have one you can always make these by hand. Goodness knows people have been making cookies since long before KA mixers were invented (I do have to say, mine makes my life so much easier, though!!**
3. Lower the mixer speed and beat in about half the flour mixture. Beat in all the molasses, then scrape the bowl and beater. Add the remaining flour mixture, about a cup at a time, and beat after each addition until it has all been absorbed.
4. Remove the bowl from the mixer and give the dough a final mixing with a large rubber spatula. Scrape half the dough onto a large piece of plastic wrap and press it to about a 1/2-inch thickness. Wrap the dough securely and repeat with the remaining dough. Chill the dough for at least 2 hours or up to 3 days (I always let mine chill overnight).
5. When you are ready to bake the cookies, prepare the cookie sheets by lining them with parchment paper and pre-heat the oven to 350 degrees F.
6. Unwrap one of the pieces of dough and cut it in half. Re-wrap the dough you are not using and return it to the fridge!
7. On a floured surface, roll out the dough to about 1/4-inch thick. Use a floured cookie cutter to cut the cookies. As they are cut, place them on the prepared pans about an inch apart in all directions. Repeat with the remaining dough. Save, press together, and re-roll the dough scraps.
8. Bake the cookies for 12-15 minutes (I only give mine 7-9 since my oven is a bit funny), or until they become dull and dry-looking and feel slightly firm when pressed with a fingertip. Slide the papers onto racks to cool. After the cookies have cooled they can be decorated with icing, candies, nuts, whatever you like.
9. Store cooled cookies between sheets of parchment or wax paper in a tin or plastic container with a tight-fitting lid.
Great Gingerbread Icing Ideas:
*1 cup powdered sugar mixed with 1-2 tbsp. water.
*1 cup powdered sugar combined with 1-2 tbsp. water plus 1/4 tsp. finely grated fresh ginger.
*2 cups powdered sugar, 1 tsp. vanilla extract, 2 tbsp. milk.
*One I haven't tried but it sounds great - mix some melted white chocolate with a little lemon extract. I made a chocolate topping for Grand Marnier cupcakes which used 3 oz. semi-sweet chocolate, coarsely chopped and 1/2 tsp. vegetable shortening. For gingerbread, I'd use 3 oz. white chocolate chopped, 1/2 tsp. veg. shortening, and 1/4-1/2 tsp. lemon extract. Melt the chocolate and shortening in a double-boiler. Place the melted chocolate mix in a large Zip-Lock bag and mix in the extract by squishing the bag. Snip a corner off the bag and use this to decorate the cookies. **You may need to play around with the extract amount - I've never tried this so I honestly wouldn't know how much to use! That amount is just a guess :)
Reference:
This is the "Gingerbread People" recipe from Nick Malgieri's "Cookies Unlimited."
Tips for Rolled Cookies
I know how much of a pest rolled cookies can be so here's a couple tips to help make your life a little easier :)
*Chill the dough for an adequate amount of time. For these sugar cookies, I let mine chill for at least 4 hours. Patience is definitely a virtue when making rolled cookies!
*Keep dough that you are not rolling/cutting in the fridge.
*Flour your work surface, rolling pin, and cutters. You can always gently dust off extra flour using a pastry brush.
*Work with small pieces of dough at a time.
*Try rolling the dough between two sheets of either wax or parchment paper. You will still need a little flour on the paper but it will prevent the dough from sticking to your counter-tops, rolling pin, or cutting board.
*Remember, they are so worth it when they're all done and decorated! :)
Christmas Sugar Cookies
 For these cookies, I used the recipe from Annie's Eats. Since I really didn't change any of the ingredients, I'll just put a link to her post. The only thing I did change was to decrease the oven temperature to 350 degrees but that's just because I have a pretty ancient oven and it seems to do best at 350! :)
Here's the link: Christmas Cookies.
Photos coming later on after I decorate them all tonight!
Frosting:
I use a very basic frosting for sugar cookies.
2 cups powdered sugar
1 tsp. vanilla extract (you could also use almond extract or do 1/2 tsp. vanilla and 1/2 tsp. almond)
2 tbsp. milk
Food colouring
Mix sugar and vanilla extract. Add milk gradually while mixing until icing is a good, slightly stiff, consistency for decorating.
Tips for Rolled Cookies
I know how much of a pest rolled cookies can be so here's a couple tips to help make your life a little easier :)
*Chill the dough for an adequate amount of time. For these sugar cookies, I let mine chill for at least 4 hours. Patience is definitely a virtue when making rolled cookies!
*Keep dough that you are not rolling/cutting in the fridge.
*Flour your work surface, rolling pin, and cutters. You can always gently dust off extra flour using a pastry brush.
*Work with small pieces of dough at a time.
*Try rolling the dough between two sheets of either wax or parchment paper. You will still need a little flour on the paper but it will prevent the dough from sticking to your counter-tops, rolling pin, or cutting board.
*Remember, they are so worth it when they're all done and decorated! :)

Friday, December 14, 2007
Butterscotch Bread Pudding

One of the girls on the Nest board hosted a recipe exchange where we all e-mailed her a recipe and then got one in return (anonymously). I got Butterscotch Bread Pudding (I still don't know who it belongs to - I hope they claim it!) and decided to make it for a San Diego Nest get-together/ornament exchange which is tonight.
Here are the results :)
This was my first time making bread pudding so I hope it tastes OK!
For the bread, I made a loaf of white bread using my bread machine. Can't beat home-made bread!

Ingredients:
3-4 cups day-old bread, cut into 1/2-inch pieces
4 cups milk
2 cups brown sugar
1/2 cup butter, melted
3 eggs, beaten
2 tsp. vanilla extract
1 cup butterscotch chips
1 tsp. ground cinnamon (I added this just for kicks!)
Method:
1. Preheat the oven to 350 degrees F. Spray a 9"x13" baking dish with Pam or grease with a little butter.
2. Gently mix the bread, milk, sugar, butter, eggs, vanilla, butterscotch chips, and cinnamon together in a large bowl. Pour this mixture into the prepared baking pan.
It should look something like this:

3. Bake the bread pudding in the preheated oven for 1 hour or until nearly set (it should wiggle a little when it is done). Can be served warm or cold.
Monday, December 10, 2007
Blondies
Confession: I have never even tried a blondie before but have been intrigued, if you will, by them for some time... maybe it's a blond thing? Anyway, I bought a bunch (ie: too many) butterscotch chips over the weekend and needed a way to use them.
I read some blondie recipes thinking they would require butterscotch chips only to find that they all said chocolate chips... well humph! I really wanted to use the butterscotch chips but figured a butterscotch-flavoured bar plus butterscotch chips would be a bit of butterscotch overload (I know, hard to imagine!) So, I sort of adjusted one to use both semi-sweet chocolate chips and some of the butterscotch chips. Here's what I ended up with:
This is enough for an 8- or 9-inch baking pan (mine is 8x8). It will yield about 18 bar cookies. You can double this if needed.
Ingredients:
1 cup packed brown sugar
1/3 cup butter
1 egg
1 tsp. vanilla
1 cup all-purpose flour
1/2 tsp. baking powder
1/8 tsp. baking soda
1/4 cup butterscotch chips
1/4 cup semi-sweet chocolate chips (yeay! Ghiradelli were on sale!)
1/2 cup chopped walnuts
Method:
Preheat oven to 350 degrees F.
1. Grease an 8- or 9-inch baking pan; set aside. In a medium saucepan, heat the brown sugar and butter over medium heat until the sugar dissolves. You will need to stir it constantly. Allow this to cool slightly before adding the egg (you do not want butterscotch scrambled eggs!). Stir in the egg and then add the vanilla. Stir in flour, baking soda, and baking powder but do not over-mix. Fold in the nuts and chips.
2. Spread the batter into the prepared baking pan. Bake in a 350 degree oven for 20-25 minutes (adjust the time to 25-30 if using a larger pan) or until a toothpick inserted in the center comes out clean. Cool slightly on a wire rack. Cut into bars while still slightly warm.
Reference:
I used several recipes to create this one! First, I found blondie recipes in the Better Homes and Gardens New Cook Book as well as Baking Illustrated. I mostly used the BH&G book but consulted the Baking Illustrated to make sure I really didn't have to just sprinkle the nuts and chips on top of the un-baked bar mixture - sure enough, I could mix them in. I also found this recipe on BakingBlonde's Blonde Ambition in the Kitchen blog which suggested using butterscotch chips.
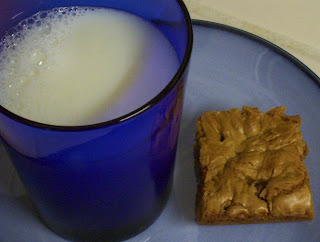
Happiness is a warm cookie and a glass of milk.
I read some blondie recipes thinking they would require butterscotch chips only to find that they all said chocolate chips... well humph! I really wanted to use the butterscotch chips but figured a butterscotch-flavoured bar plus butterscotch chips would be a bit of butterscotch overload (I know, hard to imagine!) So, I sort of adjusted one to use both semi-sweet chocolate chips and some of the butterscotch chips. Here's what I ended up with:
This is enough for an 8- or 9-inch baking pan (mine is 8x8). It will yield about 18 bar cookies. You can double this if needed.
Ingredients:
1 cup packed brown sugar
1/3 cup butter
1 egg
1 tsp. vanilla
1 cup all-purpose flour
1/2 tsp. baking powder
1/8 tsp. baking soda
1/4 cup butterscotch chips
1/4 cup semi-sweet chocolate chips (yeay! Ghiradelli were on sale!)
1/2 cup chopped walnuts
Method:
Preheat oven to 350 degrees F.
1. Grease an 8- or 9-inch baking pan; set aside. In a medium saucepan, heat the brown sugar and butter over medium heat until the sugar dissolves. You will need to stir it constantly. Allow this to cool slightly before adding the egg (you do not want butterscotch scrambled eggs!). Stir in the egg and then add the vanilla. Stir in flour, baking soda, and baking powder but do not over-mix. Fold in the nuts and chips.
2. Spread the batter into the prepared baking pan. Bake in a 350 degree oven for 20-25 minutes (adjust the time to 25-30 if using a larger pan) or until a toothpick inserted in the center comes out clean. Cool slightly on a wire rack. Cut into bars while still slightly warm.
Reference:
I used several recipes to create this one! First, I found blondie recipes in the Better Homes and Gardens New Cook Book as well as Baking Illustrated. I mostly used the BH&G book but consulted the Baking Illustrated to make sure I really didn't have to just sprinkle the nuts and chips on top of the un-baked bar mixture - sure enough, I could mix them in. I also found this recipe on BakingBlonde's Blonde Ambition in the Kitchen blog which suggested using butterscotch chips.

Happiness is a warm cookie and a glass of milk.
Monday, December 3, 2007
Grand Marnier Cupcakes

If you like orange and chocolate together, you have GOT to try these! They are so yummy (I would know, I'm eating one as I type this blog entry!)
I made these for the bridal shower I co-hosted on Saturday. I thought they were perfect since the wedding colours are pink, gold, and chocolate brown - these pretty little cakes incorporated the gold and brown quite nicely.
If you don't have Grand Marnier (or you don't drink/use alcohol), you can use orange juice. I got really lucky and found just enough left in a bottle of GM at my parents' house :) Another tip, if you have a good liquor store nearby or a BevMo, you can sometimes find the mini bottles of Grand Marnier. So much cheaper than buying a huge one! Unless, of course, you like to add it to your margaritas! ;)
These make me think of Christmas - we always get those Chocolate Oranges for Christmas (English thing...) and these have that yummy chocolate-orange combination. I might have to throw down the cash for my own bottle of GM (instead of mooching off mum and dad!) and make some for Christmas Eve!
Makes 12 Cupcakes
Cupcakes
Ingredients:
6 tbsp. unsalted butter, softened
3/4 cup sugar
1 egg
1 tbsp. finely grated orange peel
1 tsp. Grand Marnier
1 1/2 cups all-purpose flour
1/2 tsp. baking powder
1/2 tsp. baking soda
1/2 tsp. salt
1 cup sour cream
Glaze:
1/3 cup sugar
2 tbsp. fresh orange juice
2 tbsp. Grand Marnier
Topping:
3 oz. semi-sweet chocolate, coarsely chopped
1/2 tsp. vegetable shortening
Method:
1. Heat the oven to 350 degrees. Line a regular muffin pan with liners.
2. In a large bowl, beat the butter and 3/4 cup sugar at medium speed 5-6 minutes or until light and fluffy. Beat in one egg, 1 tbsp. orange peel, and 1 tsp. Grand Marnier.
3. In a medium bowl, stir together the flour, baking powder, baking soda, and salt. At low speed, beat sour cream into the butter mixture alternatively with the flour mixture. Spoon the batter into the muffin liners, filling two-thirds full (an ice-cream scoop is your best friend for this!)
4. Bake the cupcakes 20-25 minutes or until golden brown and a toothpick inserted in the center comes out clean. Remove cupcakes from the pan. Cool completely on a wire rack.
5. While the cupcakes cool, make the glaze. Heat 1/3 cup sugar and orange juice in a small saucepan over medium heat until sugar dissolves. Remove from the heat and stir in 2 tbsp. Grand Marnier.
6. Poke holes in the top of each cupcake using a toothpick. Using a pastry brush, brush the tops of each cake liberally with the Grand Marnier glaze.
7. Now you will make the chocolate topping. Place the chocolate in a small heavy Zip-Lock bag; add shortening and seal. Place the bag in a pan of simmering water and turn off the heat. Allow the bag to sit for several minutes; remove from the water. Smooth melted chocolate by working the bag with your hands. Cool 5 minutes. Cut off a tiny corner of the bag; drizzle chocolate over the cupcakes.
Subscribe to:
Posts (Atom)