So I have a LOT of tofu left over from the vegan stuffing/dressing I made and have been trying to think of interesting ways to use it up! I love tofu in stir-fries but the silken tofu just doesn't hold up so well in those types of dishes. Knowing it makes a great egg substitute, I decided to try it to make "scrambled eggs."
This was so yummy - I couldn't tell it wasn't really eggs! The texture was just a bit off but since tofu takes on the flavours of whatever you mix it with, you can't taste it. It's a pretty versatile dish - you could warm up tortillas and fill them with this and some salsa; just throw some salsa on top of the scramble; or serve this with cheese - dairy cheese would not be vegan but would be appropriate for ovo-lacto vegetarians or you could keep it vegan by using soy cheese. You could also mix in some vegan breakfast sausage that has been browned. I bet this would make a great substitute for the eggs in huevos rancheros or alongside some breakfast potatoes. I'm currently hunting for some great potato recipes so I can make some with rosemary and lavender. You can also use different spices to change up this recipe (I'll have to try those and post some more!)
This recipe is also great for people who are looking for a low-fat or low cholesterol alternative to an egg breakfast.
Ooh, I just realized I have mushrooms I could have added to this.. boo! Guess I'm making it again tomorrow :)
Serves 1 (my husband refuses to try anything that has been in the vicinity of tofu so I got to enjoy this by myself! It's easy to multiply if needed).
Ingredients:
1/8 yellow onion, diced
1/8 green bell pepper, diced (I have some frozen tri-coloured peppers that I got at Trader Joes. They are great to just dice up and throw in dishes like this!)
1/4 block silken/soft tofu, drained and pressed between paper towels
1 tsp. olive oil or vegan margarine (Smart Balance or Earth Balance are two that I've used and work well for cooking)
1/4 tsp. garlic powder
1/4 tsp. onion powder
1/8 tsp. dried parsley
1 tsp. low-sodium soy sauce
1/8 tsp. turmeric (this is optional so don't worry if you don't have any - it does give the great yellow colour, though!)
Couple dashes hot sauce
Fresh/refrigerated salsa (I don't use the shelf-stable salsa. The fresh stuff just tastes a million times better!) Pico de gallo would also work well here!
Method:
1. Slice tofu into 1-inch cubes and crumble slightly with a fork.
2. Heat oil or margarine in a small skillet over medium heat. Add onion, pepper, and tofu. Raise heat to medium-high and sautee for 3-5 minutes, stirring often.
3. Add the remaining ingredients. Reduce the heat to medium and cook 5-7 minutes, stirring frequently.
Reference:
I found this recipe by doing a Google search for tofu scramble. :) Gotta love Google! Here is the original recipe.
Saturday, December 29, 2007
Friday, December 28, 2007
Whole-Wheat Bread
This is the whole-wheat bread recipe I used in the Vegan Stuffing/Dressing recipe below. It's just the recipe from my bread machine recipe book - turned out great and worked really well in the dressing!
Ingredients:
1 5/8 cups water
1/3 cup packed brown sugar (I use the "cruelty-free" stuff that specifies it's safe for vegan cooking. Raw sugar may be a suitable option for this recipe).
2 tsp. salt
4 2/3 cups whole wheat flour
3 tsp. active dry yeast
Method:
1. Measure and add liquid ingredients to the bread pan. Your water should be between 115 and 125 degrees F.
2. Measure and add dry ingredients (except yeast) to the bread pan.
3. Use your finger to form a shallow hole in the flour where you will pour in the yeast. Yeast must not come in contact with a liquid while you are adding ingredients. Measure the yeast and carefully pour it into the hole.
4. Place the baking pan into the bread maker and close the lid.
5. Select the Whole Wheat setting and desired crust colour. Press start. This bread took about 4 hours to make including prep time (it needs 3 hours and 40 minutes in the bread maker). Make sure you leave enough time for the bread to "dry out" overnight if you are using this to make a dressing or stuffing.
Reference:
This recipe came from the little book that came with my Oster 2lb. EXPRESSBAKE (TM) Breadmaker.
Vegan Stuffing/Dressing
My parents requested the stuffing/dressing I made for Thanksgiving again for Christmas. Since we're English we serve turkey at Christmas as well and they were looking for a yummy dressing to go with it. Well, after I said I could make it, my mom asked for a vegan version that my sister and brother-in-law could have. After a bit of tweaking and an "are these ingredients OK" email to my sister, here's what I came up with for them!
This is basically the same as the Sausage and Fruit Stuffing except I used tofu for the egg and made sure the bread recipes were vegan. I halved the bread, onion, and celery amounts from the original recipe but kept the fruits, nuts, and mushrooms the same since I was not using sausage. If you'd like, you could use 1/4 pound of vegan breakfast sausage (it will specify on the packaging that it is vegan) in this recipe. Just brown the sausage before mixing in with the bread, fruit, and veggies.
This was really very yummy! Perfect alongside a Tofurkey (also very yummy!)
This will make about 4 servings ~ the leftovers of this and the regular version are wonderful!
Ingredients:
1/2 yellow onion, chopped
1 stalk celery, chopped
1 cup vegan cornbread, cubed (make the cornbread the day before so it has some time to dry out a little)
1 cup day-old whole-wheat bread, cubed (I made my own to make sure it did not contain any milk/milk sugars. Be careful here - most grocery store breads have milk).
1/6 cup vegetarian vegetable broth
1/8 cup soft/silken tofu, pureed (I just smushed mine up with a fork) - this is a great egg substitute (1/4 cup silken tofu = 1 egg)
1/4 cup dried cranberries
1/4 cup walnuts, chopped
1/2 Red Delicious apple, peeled, cored, and diced
3 white mushrooms, chopped
1/4 tsp. sage
1/8 tsp. thyme
1/8 tsp. rosemary
1/8 tsp. marjoram
1/2 tsp. applesauce
1 tsp. salt
Olive oil
Method:
Preheat oven to 350 degrees.
1. Place a small amount of olive oil in a skillet and heat over medium heat. Add the onion and celery and cook until slightly browned.
2. In a large bowl, toss together the onion, celery, cornbread, whole-wheat bread, vegetable broth, and tofu. Mix in the herbs, applesauce, salt, mushrooms, cranberries, walnuts, and apple.
3. Place the mixture in an oven-safe dish. Bake at 350 degrees for 30 minutes.
Sunday, December 23, 2007
Vegan Cornbread
I have been asked to make the sausage and fruit dressing that I made for Thanksgiving for Christmas dinner. Given that my sister and brother-in-law will be there, I wanted to make a vegan version for them. I think the cornbread really added to the original dressing recipe so I went on a hunt for a vegan cornbread that I could use as the base for their dressing. Here's the one I used.
Ingredients:
1 1/4 cups all-purpose flour
1 1/4 cups corn meal
2 tbsp. baking powder
2 tbsp. maple syrup or 1/4 cup white sugar (please look for sugar that has been processed in a cruelty-free manner; some sugars are processed using animal products...)
1 1/2 cups soy milk or other non-dairy milk
2 tbsp. olive oil
Method:
1. Preheat oven to 375 degrees. Grease muffin cups or a square pan (I used a 9-inch x 9-inch baking pan).
2. Mix the dry ingredients and maple syrup together in a large bowl. Mix the soy milk and oil together and then add all at once to the dry ingredients. Stir until just moistened.
3. Pour the cornbread batter into the prepared pan and bake at 375 degrees for 20-25 minutes.
Reference:
I found this recipe on Recipezaar. Here's a link to the original Vegan Cornbread recipe.
Thursday, December 20, 2007
Gingerbread Cookies w/ Fresh Ginger

And here's the other gingerbread recipe. I really think the fresh ginger adds something to them! If you don't have fresh ginger, you can always substitute an additional 1/2 tsp. ground ginger for the 2 tsp. of fresh ginger called for in this recipe.
**Photos coming later on after I have a chance to decorate them!**
I usually get anywhere from 30-45 cookies from this recipe; depending on which cutters I use (I have a small village worth of gingerbread men cutters!)
Ingredients:
2 1/4 cups all-purpose flour
1/4 tsp. salt
3/4 tsp. baking soda
2 tsp. ground ginger
1 1/2 tsp. cinnamon
1/2 tsp. ground allspice
2/3 cup packed brown sugar (I always use light brown sugar; since these also use molasses I don't suppose it matters if you use dark or light sugar)
2/3 cup granulated sugar
1/2 cup unsalted butter, melted, warm
1/4 cup molasses
2 tsp. grated fresh ginger
1 egg
Method:
1. In a medium bowl, combine the flour, salt, baking soda, ground ginger, cinnamon, and allspice. In a large bowl (I used my KA mixer), stir together the brown sugar, butter, molasses, fresh ginger, and egg until well-blended. Slowly stir in the flour mixture until just combined. Form dough into 2 flat rounds. Cover and refrigerate overnight or up to 3 days.
2. Line baking sheets with parchment paper and preheat the oven to 350 degrees F.
3. Lightly sprinkle rolling surface with flour. Roll one dough round to 1/8- to 1/4-inch thickness. Use cookie cutters to cut dough into desired shapes. Remove and reserve dough scraps from around each cookie - you can re-use them! Place cookies at least 1 inch apart on the prepared cookie sheets. Bake 7-9 minutes or until cookies just begin to colour at the edges. Cool completely on a wire rack. Repeat with remaining dough and dough scraps. Cookies can be decorated with frosting, nuts, candies, etc. once they are cooled.

Great Gingerbread Icing Ideas:
*1 cup powdered sugar mixed with 1-2 tbsp. water.
*1 cup powdered sugar combined with 1-2 tbsp. water plus 1/4 tsp. finely grated fresh ginger.
*2 cups powdered sugar, 1 tsp. vanilla extract, 2 tbsp. milk.
*One I haven't tried but it sounds great - mix some melted white chocolate with a little lemon extract. I made a chocolate topping for Grand Marnier cupcakes which used 3 oz. semi-sweet chocolate, coarsely chopped and 1/2 tsp. vegetable shortening. For gingerbread, I'd use 3 oz. white chocolate chopped, 1/2 tsp. veg. shortening, and 1/4-1/2 tsp. lemon extract. Melt the chocolate and shortening in a double-boiler. Place the melted chocolate mix in a large Zip-Lock bag and mix in the extract by squishing the bag. Snip a corner off the bag and use this to decorate the cookies. **You may need to play around with the extract amount - I've never tried this so I honestly wouldn't know how much to use! That amount is just a guess :)
Reference:
This recipe came from the December 2001/January 2002 issue of Cooking Pleasures Magazine. The name of the original recipe was "Golden Gingerbread People." This is also where I got the idea to add fresh ginger to the basic frosting. When I tried that the first time I thought I'd died and gone to heaven! :)
Tips for Rolled Cookies
I know how much of a pest rolled cookies can be so here's a couple tips to help make your life a little easier :)
*Chill the dough for an adequate amount of time. For these sugar cookies, I let mine chill for at least 4 hours. Patience is definitely a virtue when making rolled cookies!
*Keep dough that you are not rolling/cutting in the fridge.
*Flour your work surface, rolling pin, and cutters. You can always gently dust off extra flour using a pastry brush - especially important with darker cookies like gingerbread.
*Work with small pieces of dough at a time.
*Try rolling the dough between two sheets of either wax or parchment paper. You will still need a little flour on the paper but it will prevent the dough from sticking to your counter-tops, rolling pin, or cutting board.
*Remember, they are so worth it when they're all done and decorated! :)
Gingerbread Cookies (w/ Ground Ginger)
I actually have 2 gingerbread cookie recipes that I like - this is the one which does not require fresh ginger.
**Photos coming later after I decorate them!**
This will make a LOT of dough - enough for 30 or so large cookies. You can easily halve the recipe if needed.
Ingredients:
5 cups all-purpose flour
4 tsp. ground ginger
1 tbsp. ground cinnamon
1 tsp. freshly grated nutmeg or 1/2 tsp. ground nutmeg
1/2 tsp. ground cloves
1 tsp. salt
1/2 tsp. baking soda
16 tbsp. (2 sticks) unsalted butter, softened
2/3 cup firmly packed dark brown sugar
2 large eggs
2/3 cup molasses
Method:
1. Combine the flour, spices, salt, and baking soda in a large bowl; stir well to mix.
2. In the bowl of a stand mixer fitted with the paddle attachment, beat together the butter and brown sugar on medium speed until well mixed (about 1 minute). Beat in the eggs, one at a time, beating smooth after each addition. Scrape down the bowl and beater.
**There is no law saying you have to use a stand mixer for this! If you don't have one you can always make these by hand. Goodness knows people have been making cookies since long before KA mixers were invented (I do have to say, mine makes my life so much easier, though!!**
3. Lower the mixer speed and beat in about half the flour mixture. Beat in all the molasses, then scrape the bowl and beater. Add the remaining flour mixture, about a cup at a time, and beat after each addition until it has all been absorbed.
4. Remove the bowl from the mixer and give the dough a final mixing with a large rubber spatula. Scrape half the dough onto a large piece of plastic wrap and press it to about a 1/2-inch thickness. Wrap the dough securely and repeat with the remaining dough. Chill the dough for at least 2 hours or up to 3 days (I always let mine chill overnight).
5. When you are ready to bake the cookies, prepare the cookie sheets by lining them with parchment paper and pre-heat the oven to 350 degrees F.
6. Unwrap one of the pieces of dough and cut it in half. Re-wrap the dough you are not using and return it to the fridge!
7. On a floured surface, roll out the dough to about 1/4-inch thick. Use a floured cookie cutter to cut the cookies. As they are cut, place them on the prepared pans about an inch apart in all directions. Repeat with the remaining dough. Save, press together, and re-roll the dough scraps.
8. Bake the cookies for 12-15 minutes (I only give mine 7-9 since my oven is a bit funny), or until they become dull and dry-looking and feel slightly firm when pressed with a fingertip. Slide the papers onto racks to cool. After the cookies have cooled they can be decorated with icing, candies, nuts, whatever you like.
9. Store cooled cookies between sheets of parchment or wax paper in a tin or plastic container with a tight-fitting lid.
Great Gingerbread Icing Ideas:
*1 cup powdered sugar mixed with 1-2 tbsp. water.
*1 cup powdered sugar combined with 1-2 tbsp. water plus 1/4 tsp. finely grated fresh ginger.
*2 cups powdered sugar, 1 tsp. vanilla extract, 2 tbsp. milk.
*One I haven't tried but it sounds great - mix some melted white chocolate with a little lemon extract. I made a chocolate topping for Grand Marnier cupcakes which used 3 oz. semi-sweet chocolate, coarsely chopped and 1/2 tsp. vegetable shortening. For gingerbread, I'd use 3 oz. white chocolate chopped, 1/2 tsp. veg. shortening, and 1/4-1/2 tsp. lemon extract. Melt the chocolate and shortening in a double-boiler. Place the melted chocolate mix in a large Zip-Lock bag and mix in the extract by squishing the bag. Snip a corner off the bag and use this to decorate the cookies. **You may need to play around with the extract amount - I've never tried this so I honestly wouldn't know how much to use! That amount is just a guess :)
Reference:
This is the "Gingerbread People" recipe from Nick Malgieri's "Cookies Unlimited."
Tips for Rolled Cookies
I know how much of a pest rolled cookies can be so here's a couple tips to help make your life a little easier :)
*Chill the dough for an adequate amount of time. For these sugar cookies, I let mine chill for at least 4 hours. Patience is definitely a virtue when making rolled cookies!
*Keep dough that you are not rolling/cutting in the fridge.
*Flour your work surface, rolling pin, and cutters. You can always gently dust off extra flour using a pastry brush.
*Work with small pieces of dough at a time.
*Try rolling the dough between two sheets of either wax or parchment paper. You will still need a little flour on the paper but it will prevent the dough from sticking to your counter-tops, rolling pin, or cutting board.
*Remember, they are so worth it when they're all done and decorated! :)
Christmas Sugar Cookies
 For these cookies, I used the recipe from Annie's Eats. Since I really didn't change any of the ingredients, I'll just put a link to her post. The only thing I did change was to decrease the oven temperature to 350 degrees but that's just because I have a pretty ancient oven and it seems to do best at 350! :)
Here's the link: Christmas Cookies.
Photos coming later on after I decorate them all tonight!
Frosting:
I use a very basic frosting for sugar cookies.
2 cups powdered sugar
1 tsp. vanilla extract (you could also use almond extract or do 1/2 tsp. vanilla and 1/2 tsp. almond)
2 tbsp. milk
Food colouring
Mix sugar and vanilla extract. Add milk gradually while mixing until icing is a good, slightly stiff, consistency for decorating.
Tips for Rolled Cookies
I know how much of a pest rolled cookies can be so here's a couple tips to help make your life a little easier :)
*Chill the dough for an adequate amount of time. For these sugar cookies, I let mine chill for at least 4 hours. Patience is definitely a virtue when making rolled cookies!
*Keep dough that you are not rolling/cutting in the fridge.
*Flour your work surface, rolling pin, and cutters. You can always gently dust off extra flour using a pastry brush.
*Work with small pieces of dough at a time.
*Try rolling the dough between two sheets of either wax or parchment paper. You will still need a little flour on the paper but it will prevent the dough from sticking to your counter-tops, rolling pin, or cutting board.
*Remember, they are so worth it when they're all done and decorated! :)

Friday, December 14, 2007
Butterscotch Bread Pudding

One of the girls on the Nest board hosted a recipe exchange where we all e-mailed her a recipe and then got one in return (anonymously). I got Butterscotch Bread Pudding (I still don't know who it belongs to - I hope they claim it!) and decided to make it for a San Diego Nest get-together/ornament exchange which is tonight.
Here are the results :)
This was my first time making bread pudding so I hope it tastes OK!
For the bread, I made a loaf of white bread using my bread machine. Can't beat home-made bread!

Ingredients:
3-4 cups day-old bread, cut into 1/2-inch pieces
4 cups milk
2 cups brown sugar
1/2 cup butter, melted
3 eggs, beaten
2 tsp. vanilla extract
1 cup butterscotch chips
1 tsp. ground cinnamon (I added this just for kicks!)
Method:
1. Preheat the oven to 350 degrees F. Spray a 9"x13" baking dish with Pam or grease with a little butter.
2. Gently mix the bread, milk, sugar, butter, eggs, vanilla, butterscotch chips, and cinnamon together in a large bowl. Pour this mixture into the prepared baking pan.
It should look something like this:

3. Bake the bread pudding in the preheated oven for 1 hour or until nearly set (it should wiggle a little when it is done). Can be served warm or cold.
Monday, December 10, 2007
Blondies
Confession: I have never even tried a blondie before but have been intrigued, if you will, by them for some time... maybe it's a blond thing? Anyway, I bought a bunch (ie: too many) butterscotch chips over the weekend and needed a way to use them.
I read some blondie recipes thinking they would require butterscotch chips only to find that they all said chocolate chips... well humph! I really wanted to use the butterscotch chips but figured a butterscotch-flavoured bar plus butterscotch chips would be a bit of butterscotch overload (I know, hard to imagine!) So, I sort of adjusted one to use both semi-sweet chocolate chips and some of the butterscotch chips. Here's what I ended up with:
This is enough for an 8- or 9-inch baking pan (mine is 8x8). It will yield about 18 bar cookies. You can double this if needed.
Ingredients:
1 cup packed brown sugar
1/3 cup butter
1 egg
1 tsp. vanilla
1 cup all-purpose flour
1/2 tsp. baking powder
1/8 tsp. baking soda
1/4 cup butterscotch chips
1/4 cup semi-sweet chocolate chips (yeay! Ghiradelli were on sale!)
1/2 cup chopped walnuts
Method:
Preheat oven to 350 degrees F.
1. Grease an 8- or 9-inch baking pan; set aside. In a medium saucepan, heat the brown sugar and butter over medium heat until the sugar dissolves. You will need to stir it constantly. Allow this to cool slightly before adding the egg (you do not want butterscotch scrambled eggs!). Stir in the egg and then add the vanilla. Stir in flour, baking soda, and baking powder but do not over-mix. Fold in the nuts and chips.
2. Spread the batter into the prepared baking pan. Bake in a 350 degree oven for 20-25 minutes (adjust the time to 25-30 if using a larger pan) or until a toothpick inserted in the center comes out clean. Cool slightly on a wire rack. Cut into bars while still slightly warm.
Reference:
I used several recipes to create this one! First, I found blondie recipes in the Better Homes and Gardens New Cook Book as well as Baking Illustrated. I mostly used the BH&G book but consulted the Baking Illustrated to make sure I really didn't have to just sprinkle the nuts and chips on top of the un-baked bar mixture - sure enough, I could mix them in. I also found this recipe on BakingBlonde's Blonde Ambition in the Kitchen blog which suggested using butterscotch chips.
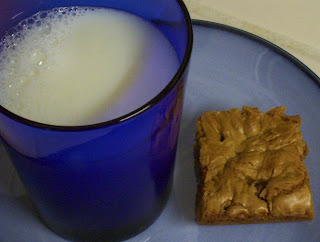
Happiness is a warm cookie and a glass of milk.
Black Bean Soup

I found the original recipe for Black Bean and Salsa Soup on Annie's blog a couple months ago and have been wanting to try it. Unfortunately, it's just not something my husband would go for! Since I'm working from home today I decided to make it for lunch.
Really yummy and very quick to make! The only change I made from the original was to add some corn and to use regular white onion in place of the green onion.
2 servings
Ingredients:
1 can black beans, drained and rinsed
3/4 cup vegetarian vegetable broth
1/2 cup salsa (I prefer the refrigerated salsa to the jar salsa)
1/2 tsp. cumin
2/3 cup frozen corn, cooked and drained
sour cream, shredded sharp cheddar, onion as a garnish
Method:
1. Pour the beans, broth, salsa, and cumin into the bowl of a food processor (you can use a blender if you don't own a food processor). Pulse until smooth.
2. Transfer the mixture to a medium saucepan. Add the cooked corn. Cook the soup over medium heat until cooked through and thoroughly heated. Ladle into bowls and garnish with the toppings.
**As far as I can tell, this soup is vegan if you leave off the cheese and sour cream.**
Monday, December 3, 2007
Sugar Cookies

I was a busy baking bee last week getting ready for that bridal shower! These were the other cookies I made - I used pink decorative sugar on them to go with the wedding colours.
Ingredients:
2 cups unbleached all-purpose flour
1/2 tsp. aluminium-free baking powder
1/4 tsp. salt
16 tbsp. (2 sticks) unsalted butter, softened
1 cup granulated sugar, plus 1/2 cup for rolling dough
1 tbsp. light brown sugar
1 large egg
1 1/2 tsp. vanilla extract
Colored sugar or edible glitter (optional) for decorating
Method:
1. Preheat the oven to 350 degrees. Line baking sheets with parchment paper.
2. Whisk the flour, baking powder, and salt together in a medium bowl; set aside.
3. Either by hand or with an electric mixer, cream the butter, 1 cup granulated sugar, and the brown sugar at medium speed until light and fluffy, about 3 minutes. Scrape down the sides of the bowl. Add the eggs and vanilla; beat at medium speed until combined, about 30 seconds. Add the dry ingredients and beat at low speed until just combined, about 30 seconds. Scrape down the bowl.
4. Place the 1/2 cup sugar for rolling on a cutting board. Roll a tablespoon of dough into a ball and roll the ball into the sugar then place it on the prepared baking pan. Repeat with the remaining dough. Butter the bottom of a drinking glass and then dip the bottom of the glass in the remaining sugar (or colored sugar). Flatten the dough balls with the bottom of the glass until they are about 3/4 inch thick, dipping the glass in sugar as necessary (every 2-3 cookies).
5. Bake until the cookies are golden brown around the edges and their centers are just set and very lightly colored, about 15 minutes. Cool the cookies on wire racks and store between sheets of wax or parchment paper in an air-tight container.
Reference:
For these cookies, I used the "Soft and Chewy Sugar Cookie" recipe from Baking Illustrated.
Lavender Shortbread Cookies
 Wow, these are cookie heaven! Seriously.. they are really good! These were yet another goodie I made for the bridal shower on Saturday. I actually made these and a batch of regular shortbread (just make this sans lavender).
You can find culinary lavender at natural food stores - check Whole Foods and Jimbo's (I found mine at Jimbo's). I found you can also order it from Penzey's (or just go pick it up if you're lucky enough to live close to one)! If you grow lavender, you can also use it from the garden. Just make sure it is grown organically so you're not adding nasty chemicals to your cookies!
The lavender adds a certain sweetness to the cookies - it works really well with the simple shortbread ingredients - and your kitchen will smell amazing while these bake!
In folklore, lavender has always been linked with love, as has food ;)
Ingredients:
2 1/2 sticks unsalted butter, softened
2/3 cup sugar
3 1/4 cups all-purpose flour
1 tbsp. dried culinary lavender or 2 tbsp. fresh lavender florets
**You may want to try using 1/3 cup granulated sugar and 1/3 cup light brown sugar for these (or regular shortbread) cookies.**
Method:
1. Preheat the oven to 325 degrees. Line 2-3 cookie sheets with parchment paper.
2. In the bowl of a standing electric mixer fitted with the paddle attachment, beat the butter and sugar on medium speed for 5-10 minutes, or until the mixture becomes light in colour and very soft and fluffy.
3. Remove the bowl from the mixer and fold in the flour by hand. The dough will be soft.
4. Place a handful of the dough at a time on a lightly floured work surface. Use a floured rolling pin to press out the dough to about 3/8 inch thick. ***Do not use a lot of flour or your shortbreads will be tough which is absolutely not the effect you want! Shortbreads are known for being light.***
5. Cut out the shortbreads using any shape cookie cutter you like (since these were for a bridal tea party, I used a heart shape). With a spatula, transfer them to the prepared pans, spacing them about 1 1/2 inches apart (they will not spread, but they do puff a little).
6. Continue in this manner until all the dough has been used. Remember to use very little flour when rolling out the dough so your last shortbread will be as tender as the first.
7. Bake for 15-20 minutes until they are just a very pale golden colour. Slide the papers from the pans onto wire racks. Store the cooled cookies between sheets of parchment or wax paper in an air-tight container.
Wonderful with a cup of hot tea!

*Photo of the regular (no lavender) shortbreads I also made*
Reference:
This is based on the "Scottish Shortbread" recipe from Nick Malgieri's Cookies Unlimited book.
Grand Marnier Cupcakes

If you like orange and chocolate together, you have GOT to try these! They are so yummy (I would know, I'm eating one as I type this blog entry!)
I made these for the bridal shower I co-hosted on Saturday. I thought they were perfect since the wedding colours are pink, gold, and chocolate brown - these pretty little cakes incorporated the gold and brown quite nicely.
If you don't have Grand Marnier (or you don't drink/use alcohol), you can use orange juice. I got really lucky and found just enough left in a bottle of GM at my parents' house :) Another tip, if you have a good liquor store nearby or a BevMo, you can sometimes find the mini bottles of Grand Marnier. So much cheaper than buying a huge one! Unless, of course, you like to add it to your margaritas! ;)
These make me think of Christmas - we always get those Chocolate Oranges for Christmas (English thing...) and these have that yummy chocolate-orange combination. I might have to throw down the cash for my own bottle of GM (instead of mooching off mum and dad!) and make some for Christmas Eve!
Makes 12 Cupcakes
Cupcakes
Ingredients:
6 tbsp. unsalted butter, softened
3/4 cup sugar
1 egg
1 tbsp. finely grated orange peel
1 tsp. Grand Marnier
1 1/2 cups all-purpose flour
1/2 tsp. baking powder
1/2 tsp. baking soda
1/2 tsp. salt
1 cup sour cream
Glaze:
1/3 cup sugar
2 tbsp. fresh orange juice
2 tbsp. Grand Marnier
Topping:
3 oz. semi-sweet chocolate, coarsely chopped
1/2 tsp. vegetable shortening
Method:
1. Heat the oven to 350 degrees. Line a regular muffin pan with liners.
2. In a large bowl, beat the butter and 3/4 cup sugar at medium speed 5-6 minutes or until light and fluffy. Beat in one egg, 1 tbsp. orange peel, and 1 tsp. Grand Marnier.
3. In a medium bowl, stir together the flour, baking powder, baking soda, and salt. At low speed, beat sour cream into the butter mixture alternatively with the flour mixture. Spoon the batter into the muffin liners, filling two-thirds full (an ice-cream scoop is your best friend for this!)
4. Bake the cupcakes 20-25 minutes or until golden brown and a toothpick inserted in the center comes out clean. Remove cupcakes from the pan. Cool completely on a wire rack.
5. While the cupcakes cool, make the glaze. Heat 1/3 cup sugar and orange juice in a small saucepan over medium heat until sugar dissolves. Remove from the heat and stir in 2 tbsp. Grand Marnier.
6. Poke holes in the top of each cupcake using a toothpick. Using a pastry brush, brush the tops of each cake liberally with the Grand Marnier glaze.
7. Now you will make the chocolate topping. Place the chocolate in a small heavy Zip-Lock bag; add shortening and seal. Place the bag in a pan of simmering water and turn off the heat. Allow the bag to sit for several minutes; remove from the water. Smooth melted chocolate by working the bag with your hands. Cool 5 minutes. Cut off a tiny corner of the bag; drizzle chocolate over the cupcakes.
Daisy Cupcakes

I co-hosted a bridal shower for a good friend over the weekend. The friend who I helped out (the other host) requested these cupcakes which I'd made for an all-girls' brunch a couple years ago. They are really cute! The last time I made them, I used green frosting and yellow spice drops to look more like actual daisies. This time, I decided to use pink frosting and pink and purple spice drops since the wedding colours are pink, chocolate brown, and gold.
Makes 12 Cupcakes
Ingredients:
1 1/2 cups all-purpose flour
1 cup granulated sugar
1 1/2 tsp. baking powder
1/2 tsp. salt
8 tbsp. (1 stick) unsalted butter, softened
1/2 cup sour cream
1 large egg plus 2 large egg yolks, at room temperature
1 1/2 tsp. vanilla extract
Quick Vanilla Frosting recipe (see below)
12 spice drops
Large marshmallows
Method:
1. Preheat the oven to 350 degrees. Line a standard muffin pan with paper or foil liners.
2. Whisk together the flour, sugar, baking powder, and salt in the bowl of a standing mixer. Add the butter, sour cream, egg, yolks, and vanilla and beat the wet ingredients into the dry at medium speed until smooth and satiny, about 30 seconds. Scrape down the bowl and stir by hand until smooth and no flour pockets remain.
3. Divide the batter evenly among the cups of the prepared pan (an ice-cream scoop works wonders for this!) Bake until the cupcake tops are pale gold and a toothpick inserted into the center comes out clean, about 20 minutes. Use a knife to lift the cakes from the tin and transfer them to a wire rack to cool. Cool to room temperature before decorating.
Quick Vanilla Frosting
Ingredients:
1 stick unsalted butter, at room temperature
1 cup confectioners' sugar, sifted
2/3 tbsp. milk
2/3 tsp. vanilla extract
dash salt
Method:
1. Using an electric mixer, beat the butter in a large bowl until fluffy, about 30 seconds. With the mixer on low speed, add the sugar and mix to combine. Increase speed to high and beat until pale and fluffy, about 1 minute. Reduce the speed to medium-low and add milk, vanilla, and salt. Increase speed to high and beat until fluffy, 30 more seconds.
2. Add food coloring, if desired, and mix until all is incorporated.
To Decorate:
1. Frost the cupcakes with the butter frosting.
2. Using a clean knife, cut each marshmallow into 4-5 pieces (it helps to dip the knife in warm water to clean it). Place the marshmallow pieces onto the frosted cakes.
3. Place a spice drop in the center of the marshmallow "petals" to form the center of the flower.
Reference:
I used the "Yellow Cupcakes with Simple Chocolate Frosting" recipe from Baking Illustrated for the cupcakes (but I did not use the chocolate frosting, obviously!) For the frosting, I used a butter cream frosting recipe I've had for years. The idea for the daisy decorations came from a Cupcake-Decorating Contest article in an issue of Cook's Country magazine (I think that just came in the mail one day, totally random! Glad I kept it, though!)
Brussels Sprouts Amandine
I was one of those strange children who actually liked Brussels sprouts when I was growing up! :) They were actually one of the things I looked forward to at Christmas because I knew they would be served with the large turkey dinner! I never claimed to be 100% normal...
My parents started making this jazzed up version of my favourite mini cabbages a few years ago and I decided to treat them, and my in-laws, to it at Thanksgiving this year.
Ingredients:
Brussels sprouts
1 tbsp. slivered almonds
1/2 tbsp. margarine or butter (I like to use Earth Balance so they're vegan)
1/2 tsp. lemon juice
Method:
1. Cook Brussels sprouts until crisp-tender. Allow to cool a little and then slice.
2. Melt the margarine in a skillet and add the almonds. Cook and stir until golden. Add the Brussels sprouts and lemon juice. Cook until sprouts are warmed through.
Apple Pie #2

I made this apple pie as an alternative to the double-crust apple pie since my husband prefers Dutch apple. This wasn't a true Dutch apple pie, I just used the crumbly topping from the fruit cobblers I make as the topping of this pie and a regular pastry crust as the base. Here's the recipe. This was almost as yummy as the two-crust pie ;)
Bottom pastry crust
Ingredients:
1 cup all-purpose flour
1/4 cup unsalted butter, chilled, cut up
1/8 cup vegetable shortening
3/4 tbsp. sugar
1/4 tsp. salt
1/6 cup to 1/4 cup ice water
Method:
1. Place all ingredients (except water) in a large bowl. Crumble together with your fingers until you have some pea-sized pieces of dough along with coarse crumbs. Add 1/3 cup water; knead just until dough begins to form, adding additional water 1 tsp. at a time if necessary.
2. Divide dough in half; shape each half into a flat round. Cover with plastic wrap and refrigerate 20-30 minutes.
3. Heat oven to 375 degrees. Lightly flour a work surface and roll one piece of dough into a 13-inch round (I can never made perfect circles..!) Gently line a 9-inch pie pan with the dough. Trim dough along the edge of the pan. Press a doubled 12-inch piece of aluminium foil inside the unbaked pie shell and cover the foil with pie weights. Bake, leaving the foil and weights in place until the dough looks dry and is light in color, about 25 minutes. Carefully remove the foil and weights and transfer the pie crust to a wire rack to cool.
Filling:
Ingredients:
2 tbsp. unbleached all-purpose flour
3 large Granny Smith apples
3 large McIntosh apples
1 tbsp. fresh lemon juice
1 tsp. grated lemon zest
3/4 cup plus 1 tbsp. granulated sugar (I wonder if light brown sugar would taste good as a substitute...?)
1/8 tsp. ground nutmeg
1/4 tsp. ground cinnamon
1/8 tsp. ground allspice
1/4 tsp. salt
Method:
Preheat oven to 375 degrees.
1. Peel, core, and quarter the apples. Cut the quarters into bite-sized pieces and toss apple pieces with the lemon juice and zest. In a medium bowl, mix 3/4 cup of the sugar, the flour, spices, and salt. Toss the dry ingredients with the apples. Turn the fruit mixture, including juices, into the pie shell and mound the fruit slightly in the center.
2. Top with crumbly cobbler topping - see recipe below.
Crumbly Topping
Ingredients:
1 cup all-purpose flour
1 cup granulated sugar
1/2 tsp. salt
1 egg, beaten
6 tbsp. melted butter
Method:
1. Sift the flour, sugar, and salt together; add the egg. Toss until crumbly then sprinkle over the apple pie filling. Drizzle with melted butter.
2. Bake at 375 degrees for 30-35 minutes or until bubbly and browned. ***It's a good idea to place your pie plate on a baking sheet so the filling does not make a mess in your oven!***
Reference:
The filling recipe is the Classic Apple Pie recipe from Baking Illustrated. The bottom pastry crust is "Perfect Pie Pastry" from Cooking Pleasures Magazine (October/November 2007). Unfortunately, I have forgotten where I got the cobbler topping recipe from - I've had it for years!
Friday, November 23, 2007
Apple Pie #1

I made two apple pies for Thanksgiving dessert this year - this one with a pastry bottom and top and one with a pastry bottom and cobbler-style top. Here is the pastry one. It was very tasty :) Apple pie is best if you leave it until the next day to eat it (and it makes great leftovers!) I served this with home-made vanilla ice-cream as a Thanksgiving dessert.
Pastry
Ingredients:
2 cups all-purpose flour
1/2 cup unsalted butter, chilled, cut up
1/4 cup vegetable shortening
1 1/2 tbsp. sugar
1/2 tsp. salt
1/3 cup to 1/2 cup ice water
Method:
1. Place all ingredients (except water) in a large bowl. Crumble together with your fingers until you have some pea-sized pieces of dough along with coarse crumbs. Add 1/3 cup water; knead just until dough begins to form, adding additional water 1 tsp. at a time if necessary.
2. Divide dough in half; shape each half into a flat round. Cover with plastic wrap and refrigerate 20-30 minutes.
3. Lightly flour a work surface and roll one piece of dough into a 13-inch round (I can never made perfect circles..!) Gently line a 9-inch pie pan with the dough. Trim dough along the edge of the pan. Leave the second piece of dough in the fridge while you prepare the filling.
Filling
Ingredients:
2 tbsp. all-purpose flour
3 large Granny Smith apples
3 large McIntosh apples
1 tbsp. fresh lemon juice
1 tsp. grated lemon zest
3/4 cup plus 1 tbsp. granulated sugar (I wonder if light brown sugar would taste good as a substitute...?)
1/8 tsp. ground nutmeg
1/4 tsp. ground cinnamon
1/8 tsp. ground allspice
1/4 tsp. salt
Method:
Preheat oven to 375 degrees.
1. Peel, core, and quarter the apples. Cut the quarters into bite-sized pieces and toss apple pieces with the lemon juice and zest. In a medium bowl, mix 3/4 cup of the sugar, the flour, spices, and salt. Toss the dry ingredients with the apples. Turn the fruit mixture, including juices, into the pie shell and mound the fruit slightly in the center.
2. Roll out the second piece of dough to a 12-inch circle; place it over the filling. Trim the edges of the top and bottom dough layers to 1/2 inch beyond the pan lip. Flute the edge or press with the tines of a fork to seal. Cut 4 slits in the dough top. Brush the pastry with a little milk and sprinkle with the remaining 1 tbsp. sugar.
3. Place the pie plate on a baking sheet and bake until the top crust is golden, about 25 minutes. Rotate the pie from front to back and continue baking until the juices bubble and the crust is a deep golden brown.
4. Transfer to a wire rack and cool completely.
References:
The filling recipe is the "Classic Apple Pie" recipe from Baking Illustrated. The pastry recipe is "Perfect Pie Pastry" from the October/November 2007 issue of Cooking Pleasures magazine.
Saturday, November 17, 2007
Thanksgiving Menu

I volunteered to host Thanksgiving this year and I'm actually really excited about it. I actually *want* to go grocery shopping for the first time in my life! lol There will only be 7 or 8 of us which is nice - not too stressful! We'll have my parents, my younger brother, my in-laws, possibly my sister-in-law, and my husband and myself. Good thing we bought a new dining room table earlier this year! :)
Here's what I'm planning:
Appetizer:
*Cheese/crackers.
*Veggies and dip.
*I *might* make a shrimp cocktail but looking at the rest of my menu, I really don't think I'll need it!
Dinner:
*Turkey (obviously)
*Two types of stuffing - one hybrid one I'm sort of making up as I go along (regular bread + cornbread, celery/onion, sage, chicken-apple sausage, and dried cranberries) and one plain/boring one with just the two breads, celery, onion, sage, thyme. The boring one will be stuffed in the bird; my hybrid one will be used as a dressing.
*Cranberry sauce.
*Apple sauce.
*Sweet potato and orange swirls (some recipe my dad has... I'll have to either get it from him or have him make them).
*Roasted potatoes (my mom will make these).
*Mashed potatoes.
*Brussels sprouts - seasoned with herbs and sauteed. They are so yummy!
*Green beans amandine.
*Carrots with a brown sugar glaze.
Desserts:
*Apple pie - regular crust-topped pie plus a Dutch apple pie for my husband.
*My mom will make a pumpkin pie for my brother/anyone else who eats that (I personally think it's vile).
*Home-made vanilla ice-cream.
Menu for November 17-24
Saturday 11/17 - Saucy Parmesan Chicken, broccoli, spaghetti, homemade marinara
Sunday 11/18 - Baked pasta with sausage, tomatoes, cheese. We'll probably have a salad on the side.
Monday 11/19 - Broiled chicken with sesame-ginger glaze, rice.
Tuesday 11/20 - Oven-fried chicken, cornbread muffins, green beans.
Wednesday 11/21 - Taco night!
Thursday 11/22 - Thanksgiving! :) I'm hosting so the menu will be coming soon.
Friday 11/23 - Turkey chili, cornbread, salad.
Saturday 11/24 - Margarita salmon, salad.
Tuesday, November 6, 2007
Pasta alla Puttanesca
So I suppose I should start by telling you what the name of this sauce translates into - pasta with harlot's sauce. You know anything with a name like that just has to be good ;)
I actually tried this for the first time at a church leadership camp a couple years ago... why my church considers me fit for church leadership is a whole other issue! ;) We go up to this great little mountain town where there is a camp that is pretty much self-sustaining. It's really a wonderful place (sadly, this camp was very badly damaged during a wild fire in late September). Anyway, the food there is just amazing - they grow all their own vegetables and it's all organic/fertilized with compost the staff makes. Anyway, I thought it was so funny when they told us what the name of this sauce meant. I remembered the translation but knew I'd never find "Harlot's Sauce" in a recipe book! lol Finally found this in one of my books and had to make it. So tasty!
The original recipe called for anchovies but I left those out since I wanted this to be vegetarian. I also halved the amount of red pepper flakes that I used since the original recipe's 1/2 tsp. made this a bit too much on the hot side!
This probably should be served with spaghetti but I didn't have any (have to break out the pasta makers!) so I just used whole wheat fussili instead.
This is a really fast dinner - perfect for week nights. It took me less than 45 minutes start to finish.
Serves 4
Ingredients:
2 1/2 cups canned tomatoes with juice
3 tbsp. extra-virgin olive oil
3 large garlic cloves, crushed
3 tsp. dried parsley
1/2 tsp. dried marjoram
4 tbsp. black olives, pitted and sliced
4 tbsp. green olives, pitted and sliced
1/4 tsp. crushed red pepper flakes
4 tbsp. small capers, drained
salt to taste if needed
spaghetti or other pasta
Method:
1. Combine the olive oil and garlic in a large skillet. Place over medium-low heat and saute gently until garlic softens - about 3 minutes.
2. Add the parsley and marjoram and saute gently, just until the herbs release their aroma, about 30 seconds.
3. Add the tomatoes (with the juice), olives, red pepper flakes, and capers. Simmer, stirring frequently, until the sauce thickens, about 20 minutes. Check for salt and add if needed.
Cook pasta according to package directions during this step.
I topped mine with a little grated Parmesan just to mellow out the red pepper flakes! It's vegan and dairy-free if you leave off the cheese (obviously!)
Reference:
I found the original recipe in a Pasta Recipes and Techniques book I got from the Cooking Club of America (of which I am a member).
Menu - Week of November 6-11
Tuesday - Pasta all Puttanesca, salad
Wednesday - Chicken enchiladas
Thursday - Chicken noodle soup
Friday - Spicy chicken and penne or broiled chicken with sesame-ginger glaze
Saturday - I will be out with one of my best friends so hubby is on his own for food...
Sunday - I think I'm going to attempt chicken pot pies!
Wednesday - Chicken enchiladas
Thursday - Chicken noodle soup
Friday - Spicy chicken and penne or broiled chicken with sesame-ginger glaze
Saturday - I will be out with one of my best friends so hubby is on his own for food...
Sunday - I think I'm going to attempt chicken pot pies!
Just Like Those Girl Scout Cookies...
I love anything citrus-y so when I found this recipe I had to try it! These were really yummy, but with 2.5 g sat fat per cookie (yes, per cookie!), they will be a once-in-a-while treat!
Makes about 4 dozen cookies
Ingredients:
1 cup butter, softened
1 cup powdered sugar plus extra for garnish, divided
1 1/2 tsp. grated lemon peel
1 1/2 tsp. lemon juice
2 1/4 cups unbleached all-purpose flour
1 cup finely chopped almonds
1/4 tsp. salt
Method:
1. Preheat oven to 400 degrees. Beat butter, 1/2 cup of powdered sugar, lemon peel, and lemon juice in a large bowl (or KA mixer) 3 minutes or until soft and creamy.
2. Combine flour, almonds, and salt in a medium bowl. Slowly beat into butter mixture.
3. Drop teaspoon-size rounds of dough onto baking sheets 1 inch apart. Bake 7-9 minutes or until light brown on bottom. Cool 5 minutes. Roll the cookies in 1/2 cup of the powdered sugar while still warm and then cool completely. Sprinkle with additional powdered sugar before serving.
Reference:
I found this in the April/May 2007 issue of Cooking Pleasures magazine.
Monday, November 5, 2007
Corn Bread Muffins

Like the baked beans below, this recipe came from the October 2007 issue of Cooking Light. These were great! They freeze well (up to 1 month) so I made a whole batch and have been serving them with different things over the last few weeks. If you freeze them, heat them through in the microwave/a warm oven - they taste even better warm!
Yield: 12 muffins
Ingredients:
2/3 cup all-purpose flour
1/2 cup yellow cornmeal
1 tbsp. sugar
1 1/2 tsp. baking powder
1/4 tsp. salt
1/2 cup shredded sharp cheddar cheese (the sharper the cheese, the better the flavour!)
1/2 cup reduced fat sour cream
1/4 cup chopped onion (subbed for the original recipe's green onions)
1 (8 3/4 ounce) can cream-style corn
Dash of hot sauce
1 large egg, beaten
Cooking spray
Method:
1. Preheat oven to 350 degrees.
2. Lightly spoon the flour into a dry measuring cup; level with a knife. Combine flour and next four ingredients (through salt) in a large bowl. Combine cheese and remaining ingredients (except cooking spray) in a small bowl; stir with a whisk. Add the cheese mixture to the flour mixture and stir until just moistened.
3. Coat the muffin pan with cooking spray. Divide batter evenly among the cups of the muffin pan. Bake at 350 for 10 minutes or until golden brown. Cool in cups 2 minutes on wire rack; remove from pan. The recipe says to let them cool completely but they are so yummy served warm!
Reference:
The original recipe can be found in the October 2007 issue of Cooking Light magazine. Corn Bread Bites.
Vegetarian Baked Beans

I'm usually a little disappointed in Cooking Light magazine - a lot of the things I've made from them are just so bland :( I picked up the October issue on a whim while waiting in line at the grocery store and boy am I glad I did! I read it while I was in a week-long conference for work in September (shhh!) and turned down the corner of so many pages - it was just chock full of recipes I had to try! I've already made several of them. This was one of my favorites. I just made one small adjustment to make the beans vegetarian since I don't eat pork products/I eat very little meat in general. If you'd like, you can add 4 slices of bacon to it - I'll put a link to the original recipe at the bottom. I wonder if soy bacon would work or if that would just be weird... probably best for me just to stick with my bacon-free version! ;)
Not sure if this is vegan or not - it has molasses which I'll have to ask my sister about... I'm pretty sure it's vegan-friendly!
This will make 10 servings.
Since I'm the only one in my house who will eat baked beans (can you believe my husband doesn't like them?! He doesn't know what he's missing!), I didn't make anywhere near that much!
Ingredients:
1 pound dried navy beans
1 cup diced onion
1 tbsp. tomato paste
1/3 cup molasses
1/4 cup packed dark brown sugar
1 minced jalapeno pepper
1 tsp. dry mustard
1/4 tsp. ground red pepper (I just used red pepper flakes)
5 cups water, divided
1 tsp. salt
Small amount of extra-virgin olive oil or other cooking oil
Method:
1. The night before you plan to make this, sort and wash your beans. Place them in a bowl or Dutch oven. Cover the beans with water to 2 inches above the beans. Cover the bowl and let them stand overnight or at least 8 hours. Drain.
2. Preheat the oven to 350 degrees.
3. Pour a small drizzle of oil in a Dutch oven or heavy-bottom sauce pan; cook 5 minutes over medium heat or until the onion begins to brown. Stir often. Add the tomato paste; cook 2 minutes, stirring often. Add molasses, sugar, jalapeno, mustard, and red pepper; stir to combine. Stir in the beans and 4 cups of water. Increase the heat to medium-high and bring this mixture to a boil. Remove the beans from the heat.
4. If you are using an oven-safe Dutch oven, cover the pan and bake at 350 degrees for 3 hours. After 4 hours, stir in the additional 1 cup water. Cover and bake an additional 1 hour or until beans are tender and liquid is almost absorbed. Remove from the oven and stir in the salt.
5. If, like me, you either don't have a Dutch oven (or, in my case, you forget you own one!), you can transfer the beans from the sauce pan to a casserole dish. Follow the rest of the instructions as in step 4.
Obviously if you change the amounts in this recipe, you will also change the cooking time. Mine did not take 4 hours to cook since I only made about 4 servings worth.
These were really yummy served with BBQ chicken and corn bread. Hubby missed out... hee hee ;)
Reference:
Here's the original recipe from Cooking Light October 2007.
Home made pasta
So I got a new toy for my birthday - the pasta roller and cutter attachments for my KitchenAid mixer! woo hoo! :) I made my first pasta - just a simple whole wheat fettuccine-style thing - a couple weeks ago (just getting back to updating this thing) and it was so yummy! Not sure I'll ever go back to the crappy store-bought stuff!

Here's the recipe I used - it's just the whole wheat pasta recipe from the little
booklet that came with the attachment set (another reason to love KitchenAid!)
I'd been warned by a few people that making pasta was a bit of a pain in the you-know-what... I really thought it was easy! I'll definitely be making more very soon!
Ingredients:
4 large eggs
2 tbsp. water
3 1/2 cups sifted whole wheat flour
1/2 tsp. salt
Method:
1. Place eggs, water, whole wheat flour, and salt in the mixer bowl. Attach bowl and flat beater. Turn to speed 2 and mix 30 seconds.
2. Exchange the flat beater for the dough hook (ooh! I get to use the dough hook!). Turn to speed 2 and knead 2 minutes. Remove dough from bowl and hand knead for 2 minutes. Divide dough into eight pieces before processing with Pasta Sheet Roller Attachment (the flat roller).
I had to add a little more water to mine since it was too dry and flaky - best to do this very gradually.
3. To cook, just add 2 tsp. salt and 1 tbsp. oil to boiling water. Gradually add pasta and continue to cook at a boil until pasta is al dente. Dry pasta will only take 7 minutes; fresh will take about 6 minutes.
I served this with a simple home-made marinara. I plan to try the spinach pasta recipe (no way my husband will touch that, though!) as well as some other "shapes" - I'd like to make some ravioli with it now that I've figured out how easy it is to do the basic stuff.
Thursday, October 11, 2007
Mmmmm... :)
Wow, I have to say a HUGE thank you to my sister!!! :) For my birthday, she brought me a big supply of British chocolate/other goodies. I just took a bite out of a Walnut Whip - haven't had one of those in 11 years! Dang, it was like heaven!! Makes me even more home-sick but I do get to go back in July so I guess I have even more to look forward to (some decent chocolate! lol)
Yum :) It's like "lunch dessert" heaven...
Yum :) It's like "lunch dessert" heaven...
Sunday, September 2, 2007
Tagged... once again!
Tagged again by Trisha and Jennyfer this time :) Let me see if I can come up with another 8 things about myself...!
1. I just had my wisdom teeth pulled - only interesting since most people get them out while they're a teenager and I'm almost 30! I was all worked up that it was going to be really gnarly - didn't phase me a bit! :) Either I'm one tough chicky or I just have a really good dentist! I do have to say I am so sick of eating bland soft food! Thank God this is healing really quickly - it will be nice to be able to eat an apple again!
2. My car is about to hit 100,000 miles! Not sure if I'm happy about that or not... I have to drive a lot for work so I put tons of miles on it.
3. I just started running again (I've tried this a bunch of times and just keep falling off the wagon!) and am really enjoying it this time! I've been able to get up to a 5K and have actually gone a little over the 3.1 miles. Trying to get up to 4 miles without stopping and then I'll sign up to run an actual 5K sometime this fall.
4. I'm currently working on my Masters in Teaching with an emphasis on educational technology. As much as I bitch and complain about the classes, I do really love them (I'm a school junkie!) and I'm now considering going back after this one to get another Masters in counseling or something! Maybe something like the National Board certification (I can call myself "uber teacher" lol) :)
5. Continuing the teacher geek stuff, I'm a huge science nerd and would love to get a thing that would allow me to teach middle school science. I know, how many people do you know who actually like working with middle school kids?! I think they're great - they are really some of my favourite students at my current job and I think it would be awesome to keep those young women interested in the sciences. :)
6. Sometimes I think I'm a bit too liberal for my own good! lol I think it gets me in trouble ;) It's funny, too, because my hubby is totally on the other side of the fence - we get into some very interesting political debates! (I'm Dharma, he's Greg...lol) Good thing I don't believe in judging people on who they are/what their beliefs are... I'd have no friends! I'm also a total greeny which he likes to make fun of me for (yes, I pick aluminum cans and paper out of the trash after he throws them in there!)
7. 98% of people mispronounce my name. It really irritates me... how hard is it?! Really people... give it a little effort! lol ;) Actually, when I first moved out here to San Diego from very rural northern England (yeah, I'll tell you about a culture shock!) and went with my mom (mum!) to register for 8th grade (crappy time to move - do not do that to your kids, please!) the secretary at the school office insisted on pronouncing my name incorrectly despite my mom correcting her multiple times. Idiot! My mom is still pissed about that... lol ;) The woman had the nerve to tell my mother she was pronouncing my name incorrectly! Who the F does that?! Honestly...
On that note, as a teacher, I really do my best to always pronounce names correctly or I ask the children how they pronounce it then make a note so I won't forget/screw it up!
8. I think it would be so much fun to drive a drag race car! Just once for the 1/4 mile... what a rush! I know, those things cannot be doing the earth a favour at all so I probably sound like a bit of a hypocrite! Maybe they can rig one to run on bio-fuel for me! lol - it will be the slowest 1/4 mile the Pomona drag strip has ever seen ;) My father-in-law is a huge race car guy (he used to drag race and currently works on his friend's stock car) and used to own a '55 Chevy that he converted to a dragster. It was awesome. Unfortunately he sold it, but he did buy the sweet '39 Chevy that we used as our wedding car after selling the '55 so I really can't complain :)
That's it... Fascinating, huh?! ;)
Tuesday, August 7, 2007
Fudge Glaze for Brownies
This is also posted at the end of my original brownie recipe but here it is again to make it a little easier to find :) I realized I promised to include it with the amaretto brownies recipe and then never did! oops...
Enough to coat 1 9-inch pan of brownies (I usually make a little less and just "drizzle" it over the bars before cutting them).
Ingredients:
1 oz. unsweetened or semi-sweet chocolate
3 tbsp. butter
1 cup powdered sugar
1 tsp. vanilla extract (for the amaretto brownies use almond extract instead!)
1-3 tbsp. warm milk
Method:
1. Melt butter and chocolate in a small saucepan. Blend in sugar and vanilla with a wire whisk. Add enough milk to make a smooth, spreadable glaze.
2. Spread or drizzle over cool brownies.
This would probably be good drizzled over cupcakes or fruit (wonder what it's like on ice cream?!)
Amaretto Brownies, Take II (Fudge)
 Those amaretto brownies I made last week were really good but I do really prefer fudge brownies to the more cake-like ones :) So, I have decided to give them another shot! I was actually going to make them tonight but discovered I had frozen my leftover almond paste so those will have to wait! I'm just going to do some kind of combination of my regular brownie recipe and the amaretto brownie recipe and see what I come up with. I hope they turn out OK! I'll come back tomorrow after I make them and let you know how they turn out/post the recipe if they are actually blog-worthy! And if not, then I still have the good cake amaretto brownies :)
Update (Wednesday): They worked!! Woohoo!! :) These are so good, even better than the cake ones which is what I hoped/suspected.
Here is the recipe I used/created for the fudge amaretto brownies:
Ingredients:
2 oz. unsweetened chocolate, cut up
1/2 cup (1 stick) unsalted butter
1 cup sugar
1/4 cup almond paste
1 tsp. vanilla extract
2 eggs
1 tbsp. amaretto
1/2 tsp. salt
1/2 tsp. aluminium-free baking powder
2/3 cup unbleached all-purpose flour
Method:
1. Preheat oven to 350 degrees. Grease an 8- or 9-inch square pan.
2. In a large saucepan, melt the butter, chocolate, and almond paste over low heat, stirring constantly. Remove from heat and cool slightly.
3. Blend in sugar, vanilla, and amaretto. Beat in eggs one at a time. Stir in salt, baking powder, and flour.
4. Bake 20-25 minutes until the brownies are set in the center (test with a toothpick). Be sure not to overbake them. Allow the brownies to cool and cut into squares. If desired, you can spread or drizzle the cooled brownies with the fudge glaze.
Enjoy! I bet these would be really good with a cup of coffee that has some amaretto stirred into it!

Mexican Rice
Told you my menu for this week would change :) We ended up having "taco night" tonight instead of burgers or whatever it was supposed to be! So... I decided to make this yummy Mexican rice I found in Amber's blog a while back (I think she found it on AllRecipes.com). Here's my slightly (hardly at all!) modified version - very yummy!
Serves 2
Ingredients:
1 1/2 tbsp. vegetable oil
1/2 cup uncooked long-grain rice
1 clove garlic
1/4 tsp. ground cumin
1/8 cup onion, chopped finely
1/4 cup tomato sauce (I usually just make my own - mix 1 1/2 tbsp. tomato paste with 2 tbsp. water)
1 cup chicken or vegetable broth (obviously will only be vegetarian if you use the veggie broth!)
1/4 cup fresh salsa (ie: not the kind that you find on a shelf in a glass jar.. ick!) Pico de gallo would also work well
Method:
1. Heat the oil over medium heat and add the rice. Cook the rice, stirring constantly until it becomes puffy and golden. Sprinkle with salt and cumin.
2. Stir in the onions and garlic and cook until tender. Stir in tomato sauce and broth; bring to a boil. Stir in the salsa and reduce the heat to low. Cover and simmer 15-20 minutes or until liquid has been absorbed.
Great as a side dish for tacos, enchiladas, fajitas, etc.
Monday, August 6, 2007
I finally tried....
...a bloody Mary! Guess I can cross that off my list of things to do before I'm 30! lol, don't worry, that was not on the list! I actually don't have a list and since I'm turning 30 at the end of September I really don't see any point in worrying about that :)
So, finally tried one. I never thought I'd like it. I love tomatoes but have just never had anything tomato juice-y (like V-8 or whatever)... we were out to breakfast on Sunday at a place on the pier in Santa Barbara (oops, forgot the name of the restaurant) and the people I was with ordered the bloody Mary's. I almost did it but chickened out and got a mimosa instead :) Well, they looked so good so I had to have a sip. Dang! Think my brunch mimosas have been replaced! lol
So spicy - it was great! And the huge shrimp hanging on the glass looked really yummy, too! lol...
Next time we're up there (um, next August), I'm definitely going to have to remember to order one of those! Yum yum...
Tuesday, July 31, 2007
Amaretto Brownies
I usually make these very fudgy chocolate brownies which I think are the best brownies I've ever tasted... might be a bit biased, but they are damn good! Anyway, being the huge brownie fan that I am, I have been on this "must find new brownie recipes" kick lately. I'm also a huge amaretto fan (well, almonds in general fan) so you can imagine my excitement when I found this! I almost started turning cartwheels down the hallway! ;) That would be quite a sight - I think I haven't done a cartwheel since I was 14...
Anyway, these are a little more on the cake brownie side, but they are still really good! DH tried one and said "wow, did you put a whole bottle of amaretto in these things?!" No, honey, that's just 2 tbsp. and a big hunk of almond paste! ;) Yes, I was eating the almond paste straight from the tube.. maybe it's a good thing that stuff is $8 for a tiny little tube! Prevent me from eating it so much!
This will make 48 brownies - I actually cut the recipe in half which is usually not a good idea! However, seemed to work Ok for these!
Ingredients:
1 cup sugar
3/4 cup butter
1/2 of an 8-ounce tube of almond paste (works out to be about 1/2 cup)
1/2 cup unsweetened cocoa powder
2 eggs
2 tbsp. amaretto or milk (now who on earth will sub milk for amaretto?! If you do have to sub milk, you could maybe add some almond extract to it...)
1 tsp. vanilla
1 1/4 cups unbleached all-purpose flour
1 tsp. aluminium-free baking powder
1/4 tsp. baking soda
1 cup milk
Optional: fudge frosting (I'll make sure I post the recipe I use) and some chopped almonds to use as a topping
Method:
Preheat oven to 350 degrees
1. Grease a 15x10x1-inch baking pan and set it aside. In a pan, heat the sugar, butter, almond paste, and cocoa powder over medium heat until the butter is melted. I also used a wooden spoon to "smush" the almond paste around until it was all melted, too. Remove from the heat and cool slightly (we are not going for amaretto scrambled eggs here!) Add the eggs, amaretto, and vanilla; beat with a wooden spoon just until combined.
2. Combine flour, baking powder, and baking soda. Add the flour mixture and milk alternatively to the chocolate mixture, beating after each addition.
3. Pour the batter into the prepared pan. Bake for 20 minutes or until a toothpick inserted near the center comes out clean (mine needed about 23 mins). Cool on a wire rack for 2 hours. If desired, frost with fudge frosting and sprinkle with chopped or sliced almonds. Cut into bars.
Reference:
I found this in the Better Homes and Gardens New Cook Book.
Better Homes and Gardens Test Kitchen (1996). Better Homes and Gardens New Cook Book. Meredith Publishing Group: Des Moines, IA.
Tuesday, July 24, 2007
Menu for week of July 22-28
I'm slacking this week! Already Tuesday and haven't posted this yet... here's the plan for this week:
Sunday/Monday: we ordered pizza on Sunday (oops...) and Monday DH was out/I never got hungry. Easy days! lol
Tuesday: Spaghetti with marinara (homemade) and meatballs for hubby.
Wednesday: Cuban-marinated chicken
Thursday: Cream-cheese chicken
Friday: Margarita salmon - I might just do salmon for hubby and do mine with shrimp... not sure yet.
Saturday: Baked teriyaki chicken for dinner; no idea for lunch! Maybe tuna melts for lunch
Tuesday, July 17, 2007
Homemade Pizza!
 I have a feeling the "dumb idea fairies" snook into my house this evening and possessed me to bake up a storm even though it's the middle of July and really hot! Phew... I made pizza and brownies today - so hot in my house at the moment! Anyway, it was worth it - the pizza was really yummy and the brownies look great (haven't tried those yet). Here's the pizza recipe... We'll be having leftovers for lunch tomorrow.
I posted this under the vegetarian label since it's really easy to convert it to veggie pizza. I just did mine half non-meat since DH is a total carnivore! There are lots of great vegetables which are wonderful on pizza.
Best thing about this pizza - it was even better the second time around! I heated it up (zapped in the microwave for a couple minutes due to a lack of time!) for lunch today and it tasted just as good if not better than it did last night. Yeay! I am definitely making this one again... shame there's no way to make it fat-free... lol
Crust:
I made the dough for my crust in my bread maker; this is the recipe which came with the machine. The recipe will make one 1.5 pound crust which was a bit much for what we needed. I think next time I'll split it in half... wonder if the dough will freeze?
Ingredients:
**All need to be at room temperature**
1/2 tsp. salt
3 cups all-purpose flour
1 1/2 tsp. active dry yeast
1 cup water
2 tbsp. olive oil
Method:
1. Combine all ingredients in the bread pan and insert the pan into the bread machine.
2. Turn on the machine and select the Dough setting.
3. Press Start/Stop. When unit signals and display reads 0:00 unplug unit and remove dough.

4. Pat dough into 12x15-inch jelly roll pan or greased 12-inch round pizza pan.

5. Preheat oven to 400 degrees.
While oven preheats, prepare the sauce.
Sauce Recipe
Ingredients:
1 8-ounce can tomato sauce
1 7 1/2-ounce can undrained tomatoes, cut up
1/2 cup chopped onion (I used half red onion and half white onion)
1 tbsp. dried basil
1 tsp. sugar
1 tsp. dried oregano
2 cloves garlic, minced
1/4 tsp. freshly ground black pepper
couple shakes of crushed red pepper
Method:
1. Combine all ingredients in a medium saucepan. Bring to a boil. Reduce heat and simmer, covered, for 10 minutes or until onions are tender.
This sauce, by the way, is amazingly yummy! I was thinking of adding other spices to it, but it really didn't need anything.

Assembling the pizza:
1. Spread sauce over dough and top with shredded mozarella cheese (about 2 cups). Top with other toppings as desired - I covered half of ours with pepperoni and left the other half just cheese. In the future, I'd like to do half veggie with mushrooms, bell peppers, onions, artichokes, etc...
2. Bake the pizza for 15-20 minutes or until crust is golden brown. Mine was "deep-dish" style (not on purpose!) so it took considerably longer to cook! Since it's just the two of us, I'll definitely split the dough and only use half of it next time.
 There it is! Please excuse the minor "small appliance porn" which got mixed in with the food porn. lol ;)
I think the melty cheese on the rim of the crust looks so appetizing... there's just something about melted cheese!
References:
As mentioned above, the dough/crust recipe came from the little book which accompanied my bread maker. The bread maker I have is an Oster 2-lb. ExpressBake bread maker.
The sauce recipe is from my copy of the Better Homes and Gardens New Cook Book. The only change I made was to add a little crushed red pepper.
Better Homes and Gardens Test Kitchen (1996). Better Homes and Gardens New Cook Book. Meredith Publishing Group: Des Moines, IA.
Subscribe to:
Posts (Atom)